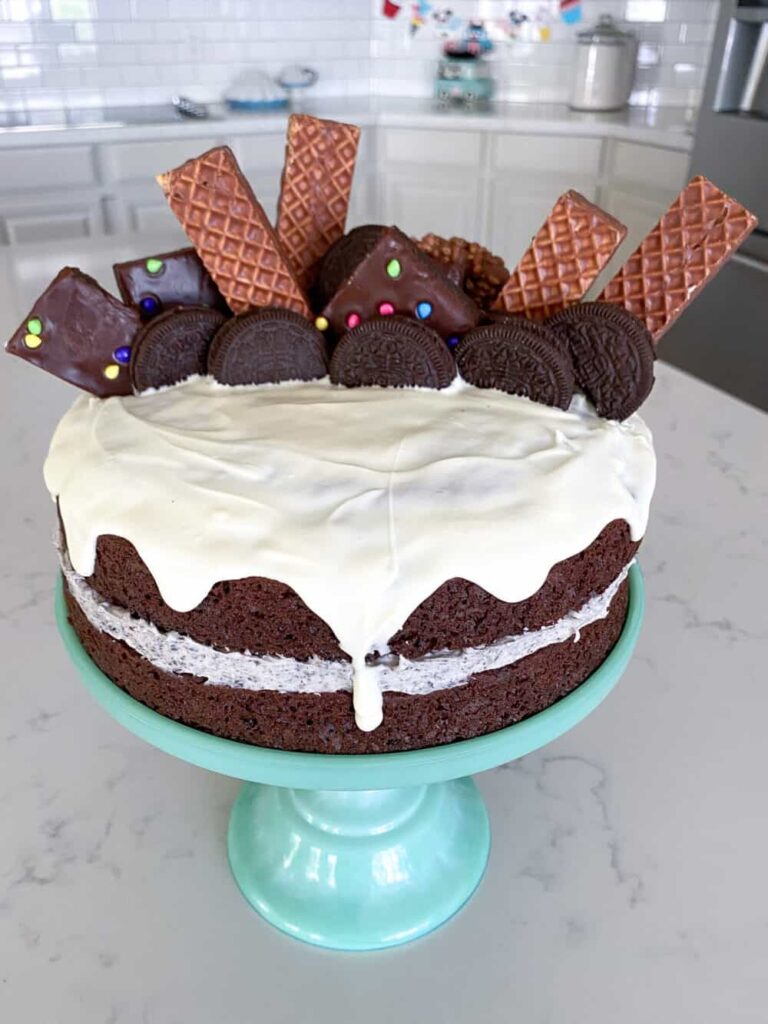

This decadent Chocolate Oreo Crunch Cake is the kind of dessert that instantly becomes the star of any celebration. It features rich, moist chocolate cake layered with a creamy Oreo filling, topped with smooth white frosting, chocolate-covered treats, crunchy wafer pieces, and plenty of crushed Oreo cookies. Every bite combines soft chocolate cake with creamy filling and crunchy chocolate toppings, making this cake perfect for birthdays, holidays, family gatherings, or simply when you want an impressive homemade dessert. The beautiful drip-style frosting and generous toppings give it a bakery-style appearance, but the preparation is surprisingly simple when you break it down into a few easy steps.
To make the chocolate cake, you will need 2 cups all-purpose flour, 1 3/4 cups granulated sugar, 3/4 cup unsweetened cocoa powder, 2 teaspoons baking soda, 1 teaspoon baking powder, 1 teaspoon salt, 2 large eggs, 1 cup buttermilk, 1/2 cup vegetable oil, 2 teaspoons vanilla extract, and 1 cup hot coffee or hot water. For the Oreo cream filling, prepare 8 ounces cream cheese softened to room temperature, 1/2 cup powdered sugar, 1 teaspoon vanilla extract, 1 cup heavy whipping cream, and 10 to 12 Oreo cookies finely crushed. For the topping, you will need 2 cups heavy cream, 1/2 cup powdered sugar, 1 teaspoon vanilla extract, additional Oreo cookies, chocolate-covered biscuits or wafer cookies, chocolate pieces, and colorful sprinkles if desired.
Begin by preparing the cake batter. Preheat your oven to 350°F (175°C). Grease two 8-inch or 9-inch round cake pans and line the bottoms with parchment paper. This will make it much easier to remove the cakes after baking. In a large mixing bowl, whisk together the flour, sugar, cocoa powder, baking soda, baking powder, and salt until evenly combined. Make sure there are no large lumps of cocoa powder remaining.
In a separate bowl, whisk together the eggs, buttermilk, vegetable oil, and vanilla extract. Slowly add the wet ingredients to the dry ingredients while mixing gently. Once the mixture is combined, gradually pour in the hot coffee or hot water. The batter will become quite thin, but this is completely normal. The hot liquid helps dissolve the cocoa powder and creates a rich, moist chocolate cake.
Divide the batter evenly between the prepared cake pans. Place the pans in the preheated oven and bake for approximately 28 to 35 minutes, depending on the size of your pans. The cakes are ready when a toothpick inserted into the center comes out clean or with a few moist crumbs attached. Avoid overbaking because the cake should remain soft and moist.
Remove the cakes from the oven and allow them to cool in the pans for about 10 minutes. Carefully transfer them to a wire rack and let them cool completely. If the tops are slightly domed, use a serrated knife to carefully level them. This will make stacking the layers easier and give the finished cake a more professional appearance.
While the cakes cool, prepare the Oreo cream filling. Place the softened cream cheese in a mixing bowl and beat until completely smooth. Add the powdered sugar and vanilla extract and continue mixing until creamy. In a separate bowl, whip the heavy cream until soft peaks form. Gently fold the whipped cream into the cream cheese mixture until light and fluffy. Finally, fold in the finely crushed Oreo cookies. The result should be a thick, creamy filling with small pieces of chocolate cookie throughout.
Place the first chocolate cake layer on a cake board or serving plate. Spread a generous layer of Oreo cream evenly across the top. Make sure the filling reaches close to the edges but does not spill over. Place the second cake layer carefully on top and gently press it down so the layers stay even.
For the outer frosting, whip the heavy cream, powdered sugar, and vanilla extract together until stiff peaks form. Spread a thin layer around the entire cake to trap any loose crumbs. This is known as a crumb coat. Place the cake in the refrigerator for about 20 to 30 minutes so the first layer of frosting can firm up.
After chilling, cover the cake with another layer of whipped cream frosting. Use an offset spatula or cake scraper to smooth the sides and top. The cake does not need to be perfectly smooth because the slightly rustic finish works beautifully with the chocolate toppings.
For the decorative chocolate drip, melt approximately 1/2 cup chocolate with 2 to 3 tablespoons heavy cream. Stir until smooth and glossy, then allow it to cool slightly. The chocolate should still be fluid but not hot. Carefully spoon small amounts around the edge of the chilled cake, allowing the chocolate to naturally drip down the sides. Once the edges are finished, spread the remaining chocolate over the top if desired.
Now comes the most fun part: decorating the cake. Arrange halved Oreo cookies around the top edge, then add chocolate-covered biscuits or wafer pieces at different angles. You can place chocolate chunks, crushed cookies, colorful sprinkles, or small chocolate candies between the larger decorations. The goal is to create different heights and textures so the cake looks abundant and festive.
For an appearance similar to the pictured cake, keep the frosting white and allow some of the rich chocolate cake layers to remain visible between the cream. Arrange several Oreo halves along the top edge and place chocolate wafer pieces upright behind them. Add a few colorful sprinkles for contrast. You can also crumble a handful of Oreo cookies over the top before adding the larger decorations.
For an extra chocolate flavor, add a thin layer of chocolate ganache between the cake and Oreo filling. You can also mix mini chocolate chips into the Oreo cream or add chopped chocolate cookies to the filling. If you prefer a lighter cake, use whipped cream frosting rather than traditional buttercream. The whipped cream pairs particularly well with the rich chocolate cake and crunchy Oreo toppings.
Before serving, refrigerate the finished cake for at least one hour. Chilling helps the layers set and makes the cake much easier to slice. When ready to serve, use a sharp knife and cut the cake into wedges. Each slice should reveal beautiful layers of moist chocolate cake, creamy Oreo filling, and smooth white frosting.
This cake is best served chilled or slightly cool. Store any leftovers in a covered cake container in the refrigerator for up to four days. Because the cake contains whipped cream and cream cheese, it should not be left at room temperature for extended periods. Keep it refrigerated until you are ready to serve.
You can easily customize this recipe for different occasions. For a birthday cake, add colorful sprinkles and candles. For a chocolate lover’s dessert, cover the top with extra chocolate shavings, truffles, and chocolate cookies. For a more elegant celebration, use white chocolate decorations and keep the design simple. You can even replace the Oreo cookies with another favorite chocolate sandwich cookie if desired.
The combination of rich chocolate cake, creamy Oreo filling, fluffy frosting, and crunchy chocolate toppings makes this Chocolate Oreo Crunch Cake an unforgettable homemade dessert. It looks impressive enough for a bakery display but uses straightforward ingredients and simple decorating techniques. Whether you’re making it for a special celebration or simply treating your family to something delicious, this cake delivers plenty of chocolate flavor and a satisfying combination of soft, creamy, and crunchy textures in every bite.