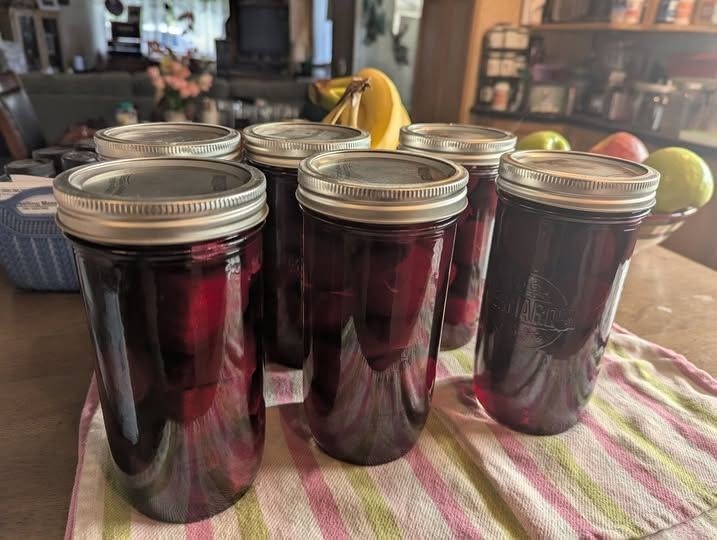

There is something special about opening a jar of homemade cherry preserves and getting that beautiful combination of sweet fruit, rich color, and fresh homemade flavor. These easy cherry preserves are made with ripe cherries, sugar, lemon juice, and a touch of vanilla, creating a thick and glossy fruit spread that is perfect for toast, biscuits, pancakes, waffles, yogurt, oatmeal, cheesecakes, and many other desserts. The deep ruby-red color makes these preserves look beautiful in glass jars, and they also make a wonderful homemade gift for friends and family.
To make this recipe, you will need about 4 pounds of fresh sweet cherries, 3 cups granulated sugar, 1/4 cup fresh lemon juice, 1 teaspoon vanilla extract, and 1 package of powdered fruit pectin if a firmer preserve is desired. You will also need clean jars with lids for storage. Fresh cherries are best when they are ripe, firm, and naturally sweet. Dark red varieties work especially well because they create a beautiful color and rich flavor.
Begin by washing the cherries thoroughly under cool running water. Remove the stems and pits from each cherry. A cherry pitter makes this process much faster, but you can also use the end of a clean chopstick, a sturdy straw, or a small kitchen tool designed for removing pits. Take your time during this step and make sure all pits are removed before continuing.
Once the cherries have been pitted, you can leave them whole or roughly chop some of them. Keeping a mixture of whole and chopped cherries gives the preserves a wonderful texture, with pieces of fruit remaining throughout the thick syrup. If you prefer a smoother spread, chop the cherries into smaller pieces.
Place the prepared cherries in a large, heavy-bottomed saucepan. Add the sugar and fresh lemon juice and stir gently. Allow the mixture to sit for approximately 15 to 20 minutes. This resting period gives the sugar time to draw some of the natural juice from the cherries.
Place the saucepan over medium heat and begin cooking the cherries. Stir frequently as the fruit warms and releases more juice. Once the mixture begins to simmer, reduce the heat slightly and continue cooking. A layer of foam may appear on the surface. You can skim this foam away with a spoon if you want a clearer and more attractive finished preserve.
Continue cooking the cherry mixture until the fruit becomes tender and the liquid begins to thicken. This usually takes approximately 20 to 30 minutes, depending on the amount of natural juice in the cherries. Stir regularly to prevent the fruit and sugar from sticking to the bottom of the pan.
If you are using powdered fruit pectin, follow the instructions on the specific pectin package because different products have different requirements. Add the pectin according to its directions rather than relying on a generic measurement. Bring the mixture back to a full boil as directed and continue cooking for the required time.
If you prefer a softer, spoonable cherry preserve without pectin, simply continue cooking the fruit and sugar mixture until it reaches the consistency you prefer. Remember that the preserves will become noticeably thicker as they cool, so do not cook them until they are extremely thick while still hot.
Once the desired consistency is reached, remove the saucepan from the heat. Stir in the vanilla extract and mix well. The vanilla adds a subtle warmth that complements the natural sweetness of the cherries without overpowering their flavor.
To test the consistency, place a small spoonful of the hot preserve onto a chilled plate and allow it to sit for a minute. Push the preserve gently with your finger or the back of a spoon. If it wrinkles slightly and holds its shape, it is ready. If it remains very liquid, continue cooking for a few more minutes and test again.
While the cherries are cooking, prepare your jars according to current safe food-preservation guidance. If you intend to make a shelf-stable canned product, use a tested recipe and proper water-bath canning procedure for the exact ingredients and jar size. Wash the jars thoroughly and process them as required for safe canning. Do not assume that simply filling jars with hot fruit and putting the lids on makes the preserves shelf-stable.
When the cherry preserves are finished, carefully ladle the hot mixture into prepared jars, leaving the headspace specified by the tested canning recipe you are following. Wipe the rims clean before applying the lids. Process the filled jars using the appropriate tested water-bath canning instructions for your recipe and altitude.
After processing, carefully remove the jars and place them upright on a towel in a draft-free area. Allow them to cool undisturbed. As the jars cool, you may hear the lids make a popping sound as they seal. Once completely cooled, check the seals according to safe canning guidance. Any jar that does not seal properly should be refrigerated and used promptly rather than stored at room temperature.
If you are not canning the preserves for long-term pantry storage, simply transfer the cooled cherry mixture to clean airtight containers and refrigerate it. Homemade cherry preserves stored in the refrigerator are convenient for everyday use and can be spooned directly onto breakfast foods or desserts.
These cherry preserves are incredibly versatile. Spread them over warm toast with butter for a simple breakfast, or spoon them onto pancakes and waffles with whipped cream. They are also delicious stirred into plain Greek yogurt or oatmeal. For dessert, warm a small amount and serve it over vanilla ice cream, cheesecake, pound cake, or brownies.
You can also use the preserves as a filling for cakes, cupcakes, cookies, and pastries. A layer of cherry preserves between chocolate cake layers creates an especially delicious combination. For a quick dessert, spread cherry preserves over puff pastry, add a little cream cheese, fold the pastry, and bake until golden.
For a slightly different flavor, you can add a small amount of almond extract instead of vanilla. Cherry and almond are a classic combination, and even a tiny amount of almond extract can create a rich bakery-style flavor. You can also add a little lemon zest for extra brightness.
When choosing cherries, avoid fruit that is bruised, moldy, or significantly damaged. Fresh, high-quality fruit produces better flavor and color. Sweet cherries work beautifully for this recipe, while sour cherries can be used if you prefer a sharper, more traditional preserve flavor. If using sour cherries, you may need to adjust the sugar according to your tested recipe and personal taste.
The finished cherry preserves should have a rich ruby-red color, tender pieces of fruit, and a thick, glossy consistency. They should be sweet but balanced by the acidity of the lemon juice. The flavor becomes even more developed after the preserves have cooled.
Homemade cherry preserves are an easy way to enjoy the flavor of summer cherries throughout the year. Whether you spread them on warm bread, spoon them over pancakes, use them in desserts, or give a beautifully labeled jar as a homemade gift, they are a delicious addition to any kitchen. With ripe cherries, sugar, lemon juice, and a little patience, you can create a flavorful fruit preserve that looks beautiful in jars and tastes even better when served with your favorite breakfast or dessert.