
Homemade Flour Storage Recipe – All-Purpose Flour, Gluten-Free Flour & Protein Pancake Mix
Introduction
Storing flour properly is a great way to keep your pantry organized and make everyday cooking easier. Whether you use all-purpose flour for bread and biscuits, gluten-free flour for special baking needs, or protein pancake mix for quick breakfasts, keeping these dry ingredients fresh can save time and reduce waste.
This simple pantry preparation guide explains how to portion flour into jars, keep moisture away, and store your ingredients properly. Although the original method suggests heating flour-filled jars in the oven, dry flour should not be oven-canned for long-term preservation. Instead, use clean, completely dry, food-safe containers with tight-fitting lids and store them in a cool, dry place.
Ingredients and Supplies
- All-purpose flour, as needed
- Gluten-free flour blend, as needed
- Protein pancake mix, as needed
- Clean, completely dry, food-safe storage jars or airtight containers
- Tight-fitting lids
- A dry measuring cup
- A clean funnel, if needed
- Labels and a permanent marker
Each quart-sized jar can hold approximately three to four cups of flour, depending on the type of flour and how loosely it is packed. Gluten-free blends and pancake mixes may have different volumes, so fill each container according to its capacity without compressing the ingredients.
Step 1: Prepare Your Storage Area
Begin by cleaning your countertop and gathering all the ingredients and supplies. Wash reusable jars and lids with warm, soapy water, rinse thoroughly, and dry them completely before use.
Moisture is one of the biggest enemies of stored flour. Even a small amount of water inside a container can cause clumping, spoilage, or mold. Allow every jar to air-dry fully before adding any dry ingredients.
Check the jars for chips, cracks, or damaged lids. Use containers designed for food storage rather than decorative jars that may not seal properly.
Step 2: Choose Your Flour
You can store different types of flour separately according to how you plan to use them.
All-Purpose Flour: This versatile flour works well for cookies, cakes, biscuits, pancakes, and many homemade bread recipes.
Gluten-Free Flour: Choose a gluten-free blend suitable for your favorite recipes. Some blends contain rice flour, tapioca starch, potato starch, or other ingredients. Keep gluten-free flour separate from regular flour to prevent cross-contact.
Protein Pancake Mix: You can store a commercially prepared dry pancake mix or prepare a homemade dry blend using ingredients appropriate for your recipe. If your mix contains powdered milk, protein powder, or other specialty ingredients, follow the storage instructions for those ingredients.
Always inspect flour before storing it. Do not use flour that smells rancid or musty, contains visible insects, or shows signs of moisture or mold.
Step 3: Fill the Jars
Place a clean, dry funnel over the opening of each jar if necessary. Slowly pour the flour into the container using a dry measuring cup.
Avoid packing the flour tightly. Lightly filling the jar makes it easier to scoop the ingredient later and helps you estimate how much remains.
Leave enough room at the top to fit the lid without spilling flour around the rim. Wipe the rim with a clean, dry cloth if any flour has collected there.
Prepare separate jars for each type of flour or mix. Keeping ingredients separate helps prevent confusion and makes it easier to identify the correct ingredient when cooking.
Step 4: Do Not Oven-Can Dry Flour
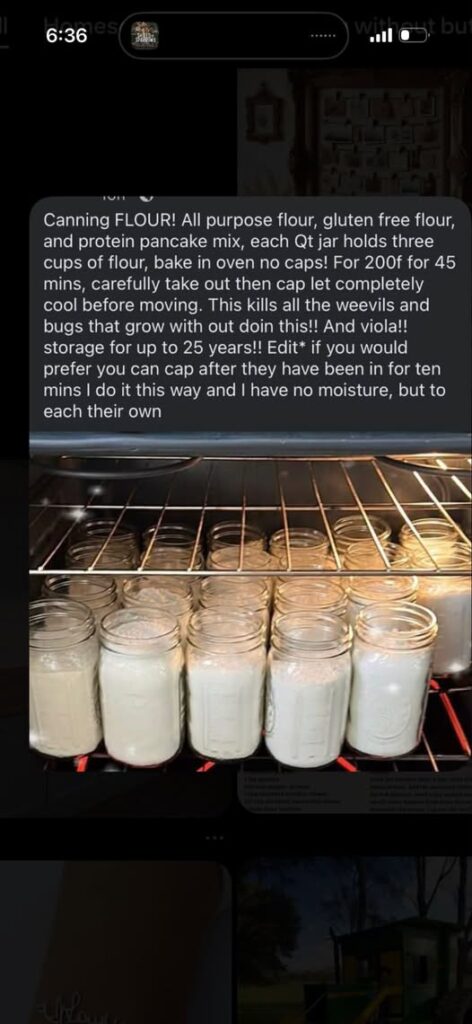
The original post recommends heating flour-filled jars at 200°F for 45 minutes and then allowing them to cool before adding the lids. However, this method is not a validated preservation process.
Dry flour is not a suitable product for home oven canning. Heating filled jars in an ordinary oven does not reliably establish safe preservation conditions, and sealing a jar afterward does not guarantee that the flour will remain free from pests or contamination for decades.
Do not rely on oven heating to make flour shelf-stable for 25 years. Instead, store flour in airtight containers or suitable food-storage bags and follow the manufacturer’s recommendations for storage and shelf life.
If you want to protect flour from pantry pests, purchase fresh flour from a reliable source and keep it in clean, tightly closed containers. For additional protection, freezing flour in a suitable sealed package can help control insect eggs and pests. Keep the flour protected from condensation when bringing it back to room temperature.
Step 5: Seal and Label the Containers
Once the flour is inside the container, close the lid according to the container manufacturer’s instructions.
Write the following information on a label:
- Name of the flour or mix
- Date purchased or packaged
- Best-before date from the original package, where applicable
- Any special preparation notes
For homemade pancake mix, also write down the ingredients and the amount of liquid needed. This makes breakfast preparation much easier.
Labels are especially helpful when several white powders look similar. Never identify flour by appearance alone.
Step 6: Store the Jars Properly
Place your containers in a cool, dry, dark cupboard away from direct sunlight, heat sources, sinks, and steam from cooking.
Avoid storing flour near an oven or dishwasher, where temperature changes and humidity may be higher. Keep the storage area clean and check the containers occasionally for damaged lids, unusual smells, clumping, or signs of insects.
For longer storage, consider keeping flour in the freezer in moisture-resistant, airtight packaging. Different flours have different storage lives, especially whole-grain flour, which contains more natural oils and can become rancid more quickly than refined flour.
Follow the packaging instructions and rotate your stock by using older flour first.
Step 7: How to Use Your Stored Flour
When you are ready to bake, open the container with dry hands and use a clean, dry measuring cup. Close the lid immediately after taking out the amount you need.
For all-purpose flour, measure according to your recipe. For gluten-free baking, use a blend specifically designed for the product you are making because different blends absorb moisture differently.
For protein pancake mix, follow the recipe’s recommended liquid ratio. Stir the dry mixture before measuring if the ingredients have settled during storage.
Do not return leftover flour from a measuring cup to the original container if the cup has been exposed to moisture or other ingredients.
Final Thoughts
Preparing flour jars in advance is an easy way to organize a pantry and make everyday cooking more convenient. All-purpose flour, gluten-free flour, and protein pancake mix can all be stored efficiently when kept dry, protected from pests, and placed in suitable airtight containers.
The key is to use clean storage equipment, label every jar, monitor freshness, and follow appropriate storage guidance for each ingredient. Avoid the oven-canning method and do not assume that heating and sealing flour makes it safe for 25 years.
With proper storage and regular stock rotation, you can keep your baking ingredients organized and ready for biscuits, homemade bread, pancakes, and many other family favorites.