

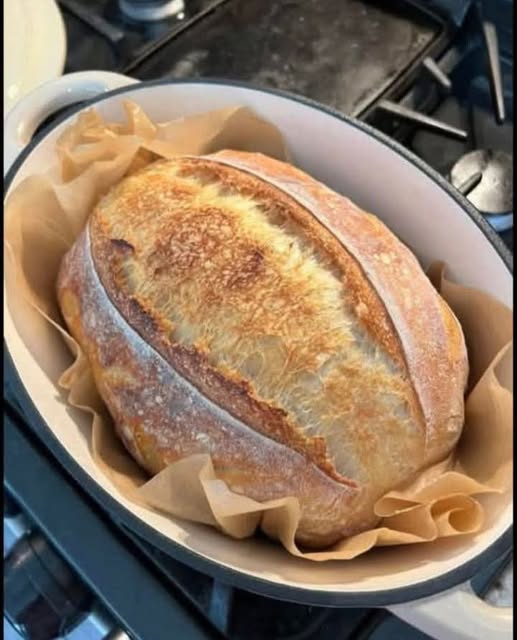
A Labor of Love: The Ultimate Sourdough Loaf
There is nothing quite like the sensation of pulling a deeply bronzed, crackling sourdough loaf from your own oven. The aroma of fermented grains and toasted crust that fills your kitchen is a reward in itself. This recipe is not a quick fix; it is a ritual, a slow dance with flour, water, and wild yeast. The result is a loaf with a crisp, shattering crust, an open, airy crumb, and a complex, tangy flavor that no commercial yeast can replicate.
This recipe is designed for the home baker. It breaks down the seemingly mystical process of sourdough baking into manageable steps, focusing on technique and understanding rather than rigid timelines. The “intensity” is low in terms of active work, but it requires patience and attention to detail. Your reward will be a beautiful, artisanal loaf that is both deeply satisfying to make and a joy to eat.
Ingredients
-
100g Active Sourdough Starter (See Recipe Notes)
-
375g Warm Water (around 75-80°F / 24-27°C)
-
450g Bread Flour
-
50g Whole Wheat Flour (adds flavor and complexity)
-
10g Fine Sea Salt
Equipment
-
Digital Kitchen Scale (essential for accuracy)
-
Large Mixing Bowl
-
Bench Scraper
-
Proofing Basket (Banneton) or a bowl lined with a floured tea towel
-
Razor Blade or Sharp Knife (Lame) for scoring
-
Dutch Oven with a lid
Instructions
Step 1: The Levain Build (Morning, Day 1)
This step wakes up your starter and ensures it’s strong and active for the main dough.
-
Activate Your Starter: About 4-8 hours before you plan to mix your dough, feed your sourdough starter. Take 20g of your stored starter and mix it with 100g of warm water and 100g of bread flour. Stir until combined, cover loosely, and let it sit at room temperature.
-
Peak Readiness: The levain is ready when it has doubled in size, is full of bubbles, and has a slightly domed top. A small spoonful of it should float in a glass of warm water. This is your signal to begin.
Step 2: Autolyse & Mixing (Afternoon, Day 1)
*Intensity: Low | Time: 30-60 minutes*
-
Combine Flours and Water: In a large mixing bowl, whisk together the 450g bread flour and 50g whole wheat flour. Pour in the 375g warm water and mix with your hands or a spatula until no dry bits of flour remain. The dough will be shaggy and sticky.
-
Autolyse Rest: Cover the bowl and let it rest for 30-60 minutes. This “autolyse” (a French term) allows the flour to fully hydrate, making the gluten strands develop more easily and resulting in a better rise and more open crumb.
Step 3: Incorporating Starter and Salt
Intensity: Low | Time: 15 minutes
-
Add the Levain: Add your 100g of active levain to the top of the rested dough. Use wet hands to dimple and pinch the starter into the dough, folding and turning the mass until the starter is fully incorporated and no streaks remain.
-
Rest: Cover the bowl and let it rest for another 30 minutes.
-
Add the Salt: Sprinkle the 10g of salt over the dough. Add a tiny splash of water (about a teaspoon) to help it dissolve. Once again, use wet hands to pinch, fold, and squeeze the dough until the salt is fully incorporated.
Step 4: Bulk Fermentation & Coil Folds (Afternoon/Early Evening, Day 1)
*Intensity: Very Low | Time: 4-6 hours*
This is the primary rise where the dough develops its strength and flavor.
-
Coil Folds: Over the next 4-6 hours, you will perform a series of “coil folds.” This gentle technique builds strength without degassing the dough. Every 30 minutes for the first 2-3 hours, perform a set of coil folds:
-
With wet hands, reach under one side of the dough in the bowl.
-
Lift it straight up and fold it over onto itself.
-
Rotate the bowl a quarter turn and repeat 3-4 more times until the dough feels tighter.
-
-
Monitor, Don’t Time: The dough is ready for the next step when it has increased in volume by about 30-50%, is smooth and domed on top, and is full of air bubbles. It should feel airy and jiggle if you shake the bowl. The time can vary greatly based on your kitchen’s temperature.
Step 5: Pre-shape, Bench Rest, and Final Shape (Evening, Day 1)
Intensity: Medium | Time: 30 minutes
-
Turn Out and Pre-shape: Lightly flour your work surface. Gently turn the dough out. Using a bench scraper, shape the dough into a loose round. Let it rest uncovered for 20-30 minutes (the “bench rest”). This allows the gluten to relax.
-
Final Shape: Lightly flour your work surface again. Gently flip the dough over. Pull the bottom third of the dough up and over to the center, then the left and right sides, and finally the top, creating a tight “envelope.” Roll the dough over so the seam side is down. Using a bench scraper, drag the dough in a circular motion to create surface tension on the outside.
-
Prepare the Banneton: Generously dust a proofing basket (banneton) with a 50/50 mix of rice flour and all-purpose flour (rice flour prevents sticking).
Step 6: Cold Proof (Overnight, Day 1 to Day 2)
*Intensity: None | Time: 12-16 hours*
-
Transfer: Place the shaped dough seam-side up into the prepared banneton.
-
Cover and Chill: Cover the banneton with a plastic bag or shower cap and place it in the refrigerator for 12-16 hours. This long, cold fermentation is crucial for developing the classic sourdough tang and improving the oven spring.
Step 7: Baking (Morning, Day 2)
Intensity: Medium | Time: 1 hour
-
Preheat: Place your Dutch oven, with the lid on, into your oven. Preheat to 475°F (245°C) for at least 45-60 minutes. It needs to be screaming hot.
-
Score the Dough: Carefully remove the banneton from the fridge. Place a piece of parchment paper over the top and invert the banneton to turn the dough out onto the parchment. Using a razor blade (lame), make one confident, swift slash about ½-inch deep across the top of the loaf. This “score” allows the steam to escape and directs the oven spring.
-
Bake Covered: Carefully transfer the dough, holding the parchment paper, into the preheated Dutch oven. Put the lid back on and bake for 25 minutes. The trapped steam created by the lid is what gives you that incredible, crisp crust.
-
Bake Uncovered: After 25 minutes, remove the lid. The loaf will be pale but well-risen. Reduce the oven temperature to 450°F (230°C) and bake for another 20-25 minutes, uncovered, until the crust is a deep, golden brown.
-
Cool Completely: This is the hardest but most important step. Transfer the loaf to a wire cooling rack and let it cool completely for at least 3-4 hours before slicing. The internal structure is still setting, and cutting it warm will result in a gummy crumb.
Nutrition (Per Slice, estimated for 1/12th of loaf)
-
Calories: ~180 kcal
-
Total Fat: 0.5g
-
Sodium: 325mg
-
Total Carbohydrates: 37g
-
Dietary Fiber: 1.5g
-
Sugars: 0.2g
-
-
Protein: 6g
Note: Nutritional information is an estimate and can vary based on specific ingredients used.
Recipe Notes & Troubleshooting
-
Starter Maintenance: Your starter must be active and bubbly. If it hasn’t been fed recently, give it 2-3 feeds over 24 hours to revive it before building the levain.
-
Hydration is Key: This is a moderately hydrated dough. Weights are critical; cups are not reliable for baking bread at this level.
-
My dough didn’t rise much in the oven (poor oven spring): This is usually due to under-proofing or over-proofing. Use the visual and tactile cues (jiggle, bubble presence, volume increase) during bulk fermentation rather than the clock. A dough that is proofed too long will collapse when scored.
-
The crust is too pale: Your oven might not be hot enough. Ensure a full preheat. You can also bake for a few extra minutes uncovered.
-
The crust is too thick/hard: This can happen if baked too long. You can introduce a steam bath in your oven (a pan of water on the lower rack) for the first part of baking if not using a Dutch oven, but the Dutch oven method is superior for home bakers.
Enjoy the process and the incredible, wholesome results of your labor. Happy baking
