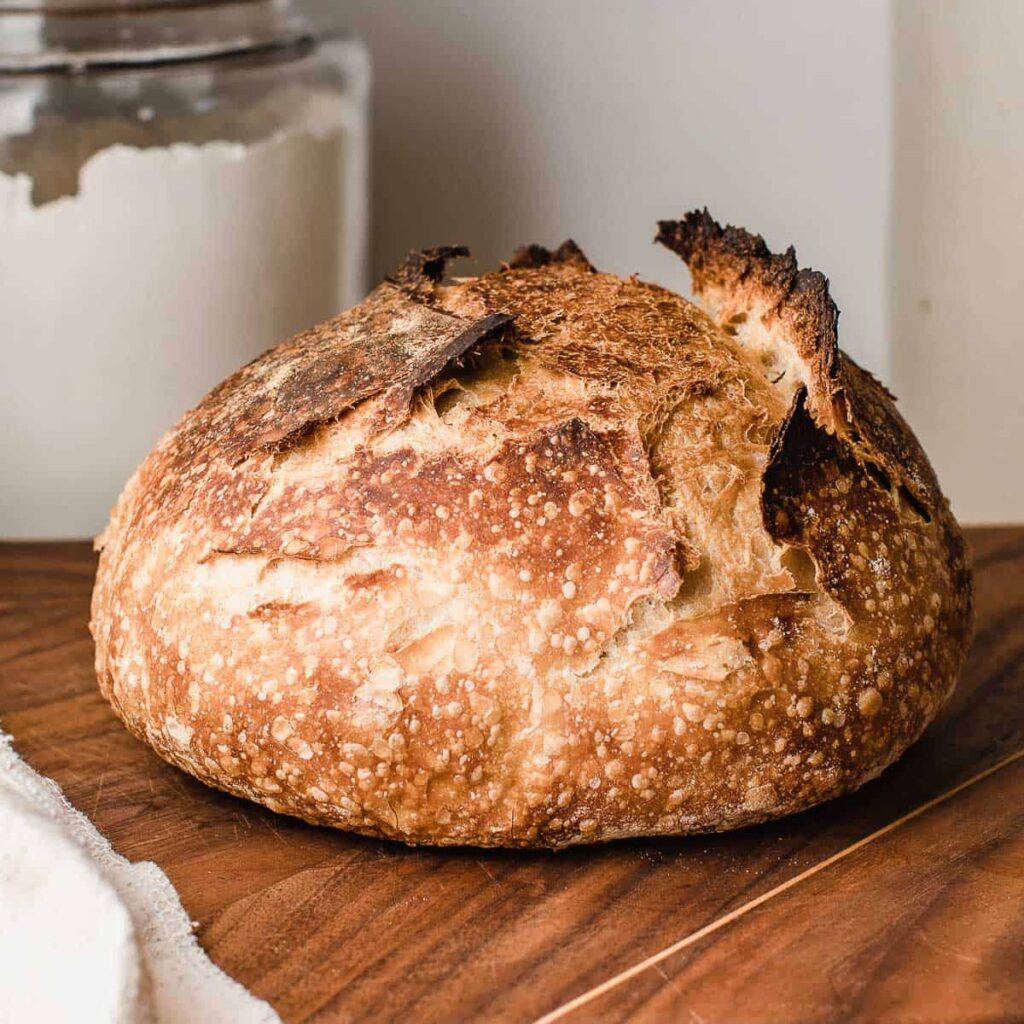

There is something incredibly satisfying about baking a beautiful loaf of homemade artisan bread from scratch. This rustic bread has a wonderfully crisp, golden-brown crust on the outside and a soft, airy, slightly chewy center on the inside. The deep golden crust and naturally rustic appearance make it look like something you would find in a traditional bakery, but it can actually be made at home with a few simple ingredients. This recipe is perfect for beginners because it does not require complicated equipment or advanced baking techniques. With flour, water, yeast, salt, and a little patience, you can create a delicious loaf with an impressive crust and a tender interior.
To make this homemade artisan bread, you will need 3 cups of all-purpose or bread flour, 1 1/2 teaspoons salt, 1 teaspoon instant yeast, and 1 1/2 cups warm water. You will also need a small amount of flour or cornmeal for dusting the work surface and parchment paper for handling the dough. For the best results, use bread flour because its higher protein content helps create a stronger dough and a chewier texture, but regular all-purpose flour works very well too.
Begin by preparing the dough. Add the flour, salt, and instant yeast to a large mixing bowl and whisk them together until evenly distributed. Slowly pour in the warm water while stirring with a wooden spoon or spatula. Continue mixing until all of the flour has been incorporated and a rough, sticky dough forms. The dough should look shaggy rather than smooth at this stage. Do not worry if it appears wetter or stickier than traditional bread dough because this high-hydration dough is what helps create the large air pockets and soft interior associated with artisan bread.
Once the dough has come together, cover the bowl tightly with plastic wrap or a clean kitchen towel. Leave it at room temperature for approximately 8 to 12 hours. Overnight fermentation is particularly convenient because you can mix the dough before going to bed and bake it the following morning. During this long resting period, the yeast slowly develops the dough and creates a deeper flavor and lighter texture. The dough should become noticeably larger, bubbly, and airy when it is ready.
When the dough has finished its first rise, lightly flour your work surface. Carefully scrape the dough from the bowl using a dough scraper or spatula. Try not to completely deflate it because the trapped air contributes to the open texture of the finished bread. Gently fold the dough over itself several times, then shape it into a rough round loaf. You do not need to knead it aggressively. The goal is simply to create enough surface tension to help the loaf hold its shape.
Place the shaped dough onto a piece of parchment paper lightly dusted with flour. Cover it loosely with a clean towel and allow it to rest for approximately 30 to 45 minutes. This short second rise gives the gluten time to relax and allows the dough to become slightly puffier before baking.
While the dough is resting, preheat your oven to 450°F (230°C). Place a heavy Dutch oven or oven-safe covered baking pot inside the oven while it preheats. Allow the pot to heat for at least 30 minutes. Preheating the Dutch oven is one of the most important steps because the extremely hot surface immediately begins cooking the dough while the enclosed environment traps steam. This steam helps the bread expand dramatically during the first part of baking and produces the thin, crisp crust that makes artisan bread so delicious.
When the oven and Dutch oven are fully heated, carefully remove the pot using oven mitts. Transfer the dough into the hot pot using the parchment paper as a sling. Be extremely careful because the pot will be very hot. Use a sharp knife or bread lame to make one or two shallow cuts across the surface of the dough. These cuts allow steam to escape in a controlled way and also create the attractive split crust seen on rustic bakery-style loaves.
Cover the Dutch oven with its lid and carefully return it to the oven. Bake the bread covered for approximately 25 minutes. During this stage, the trapped steam keeps the surface of the dough moist and allows the loaf to expand. After 25 minutes, carefully remove the lid. You should see that the bread has risen considerably and developed a light golden color.
Continue baking the uncovered loaf for another 15 to 20 minutes, or until the crust becomes a deep golden brown. If you prefer an especially dark and crunchy crust, you can allow it to bake for a few additional minutes, but keep a close eye on it during the final stage so the crust does not burn.
Once the bread is finished, carefully remove it from the Dutch oven and transfer it to a wire cooling rack. Do not slice the bread immediately. Although it may be tempting to cut into the hot loaf, allowing it to cool for at least one hour gives the interior time to finish setting. Cutting too early can cause the crumb to become gummy and may release too much moisture.
When the loaf has cooled, use a serrated bread knife to cut it into thick slices. The finished bread should have a crisp, deeply browned crust and a soft, airy interior with irregular holes. Spread a slice with butter while it is still slightly warm, or serve it with olive oil, jam, honey, cream cheese, or your favorite spread. The bread is also excellent for sandwiches, toast, bruschetta, garlic bread, and hearty soups.
For the best flavor, use fresh ingredients and allow the dough enough time to ferment. The long fermentation is responsible for much of the bread’s flavor, so avoid trying to speed up the process too much. If your kitchen is particularly cold, the dough may require additional time to rise. On the other hand, a warm kitchen can cause the dough to ferment faster. Instead of relying only on the clock, look for visual signs such as bubbles, increased volume, and a soft, airy appearance.
If you do not have a Dutch oven, you can still bake this bread on a baking sheet. Preheat a heavy baking tray or pizza stone and place the shaped dough on it. To create steam, place a separate metal baking pan on the bottom rack of the oven and carefully pour hot water into it immediately after placing the bread in the oven. Close the oven door quickly to trap the steam. Bake until the loaf is deeply golden and sounds hollow when tapped underneath.
You can also customize this basic artisan bread recipe by adding different ingredients. Try mixing in roasted garlic, dried herbs, grated cheese, olives, chopped rosemary, sun-dried tomatoes, or seeds. For a slightly sweeter loaf, a small amount of honey can be added to the dough. You can also replace part of the white flour with whole wheat flour for a heartier flavor and texture.
Store the completely cooled bread in a paper bag or bread box at room temperature for up to three days. Avoid storing crusty bread in a sealed plastic bag because trapped moisture can soften the crust. If you want to keep the bread for longer, slice it and place the slices in a freezer-safe bag. Frozen bread can be reheated directly in a toaster or oven whenever needed.
This homemade artisan bread is a simple recipe that produces impressive bakery-style results. Its beautifully crisp crust, soft airy center, and rustic appearance make it perfect for everyday meals as well as special occasions. Whether you enjoy it with butter for breakfast, alongside a warm bowl of soup, or as the foundation for a delicious sandwich, this homemade loaf is sure to become a favorite. The recipe requires very little hands-on work, but the long resting time gives the dough plenty of opportunity to develop flavor and texture. Once you experience the aroma of freshly baked bread coming from your own oven and hear that satisfying crisp crust crackle as the loaf cools, you will understand why homemade artisan bread is worth making again and again.