

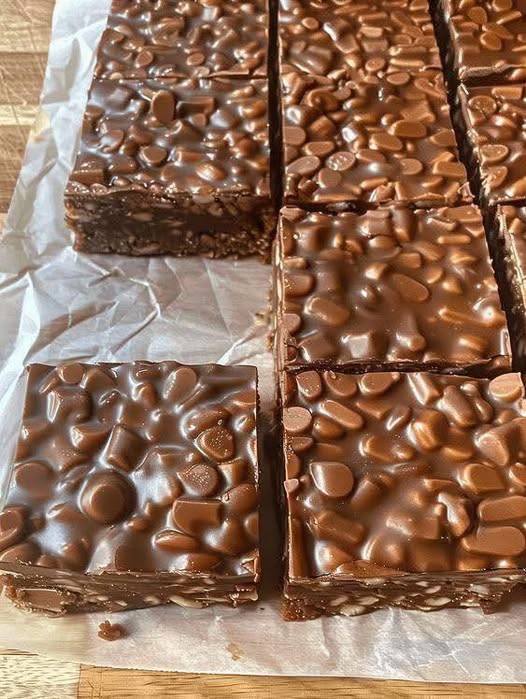
No-Bake Chocolate Peanut Butter Crunch Bars
🛒 Ingredients
For the Peanut Butter Base
-
Butter 🧈 – 1 cup (226g), unsalted, melted
-
Peanut Butter 🥜 – 1½ cups (375g), creamy or crunchy
-
Icing Sugar – 2 cups (240g), sifted
-
Rice Krispies 🍚 – 4 cups (112g)
-
Vanilla Extract – 1 teaspoon
For the Chocolate Topping
-
Milk Chocolate Chips 🍫 – 1½ cups (255g)
-
Peanut Butter 🥜 – ½ cup (125g)
-
Mini Chocolate Chips – ½ cup (85g)
📝 Instructions
Step 1: Prepare the Baking Pan
Start by selecting a 9×13 inch baking pan for standard-sized bars. If you prefer thicker bars, you can use an 8×8 inch pan, but cutting may be slightly harder later.
Line the pan completely with parchment paper, making sure the paper covers the bottom and all sides. Leave some extra parchment hanging over the edges. This overhang will help you lift the bars out easily once they are set, without breaking or sticking.
Set the prepared pan aside on a flat surface.
Step 2: Melt the Butter
Place the butter in a large microwave-safe bowl. Microwave on medium heat in 30-second intervals, stirring after each interval. Continue until the butter is fully melted and smooth.
Do not overheat the butter. It should be liquid but not boiling, as excessive heat can affect the texture of the peanut butter mixture later.
Once melted, allow the butter to cool slightly for about 1 minute before adding other ingredients.
Step 3: Combine Butter, Peanut Butter, and Vanilla
Add 1½ cups of peanut butter directly into the melted butter. Use a spatula or wooden spoon to mix thoroughly until the mixture becomes smooth and glossy.
Next, add 1 teaspoon vanilla extract. Stir again until evenly combined. This step ensures that the base has a balanced flavor and smooth consistency.
Make sure there are no streaks of butter or unmixed peanut butter left in the bowl.
Step 4: Add the Icing Sugar
Gradually add the icing sugar to the peanut butter mixture. Add it in small portions, mixing after each addition.
The mixture will start to thicken as the sugar is incorporated. Continue mixing until the sugar is fully blended and the mixture looks uniform and creamy.
Scrape the sides and bottom of the bowl to ensure no dry sugar remains. The base should now be thick but still easy to mix.
Step 5: Fold in the Rice Krispies
Add the Rice Krispies cereal to the bowl. Using a spatula, gently fold the cereal into the peanut butter mixture.
Mix slowly and carefully to avoid crushing the cereal. The goal is to coat every piece evenly while keeping the cereal crunchy.
Continue folding until all the Rice Krispies are fully coated and no dry cereal remains visible.
Step 6: Press the Base into the Pan
Transfer the prepared peanut butter and cereal mixture into the lined baking pan.
Using a spatula, spoon, or the back of a measuring cup, press the mixture firmly and evenly into the pan. Make sure the base reaches all corners and edges.
Apply even pressure so the base is compact and flat. This helps the bars hold their shape when cut.
Once pressed, place the pan in the refrigerator to chill while you prepare the chocolate topping.
Step 7: Prepare the Chocolate Topping
In a clean microwave-safe bowl, add 1½ cups milk chocolate chips and ½ cup peanut butter.
Microwave the mixture on medium power in 30-second intervals. After each interval, stir well to distribute the heat evenly.
Continue heating and stirring until the chocolate and peanut butter melt completely and form a smooth, glossy mixture.
Avoid overheating, as burned chocolate can become grainy and thick.
Once melted, allow the chocolate mixture to cool slightly for 1–2 minutes before pouring.
Step 8: Pour the Chocolate Layer
Remove the pan from the refrigerator. Pour the melted chocolate mixture evenly over the chilled peanut butter base.
Use a spatula to gently spread the chocolate across the entire surface, making sure it reaches all corners.
Work slowly and evenly to create a smooth top layer without disturbing the base underneath.
Step 9: Add Mini Chocolate Chips
Immediately sprinkle ½ cup mini chocolate chips over the melted chocolate layer.
Lightly press them into the surface using your hand or the back of a spoon so they stick properly once set.
Distribute the chips evenly to ensure every bar has a balanced amount of chocolate.
Step 10: Chill Until Fully Set
Return the pan to the refrigerator. Allow the bars to chill for at least 2–3 hours, or until the chocolate topping is completely firm.
Do not rush this step. Proper chilling ensures clean cuts and a stable structure.
The bars should feel solid to the touch once fully set.
Step 11: Remove and Cut
Once fully set, lift the bars out of the pan using the parchment paper overhang.
Place the slab on a cutting board. Using a sharp knife, cut into equal-sized bars or squares.
For cleaner cuts, wipe the knife clean between slices.
Step 12: Ready to Serve
The bars are now ready to serve. Keep any leftovers stored in an airtight container in the refrigerator.
