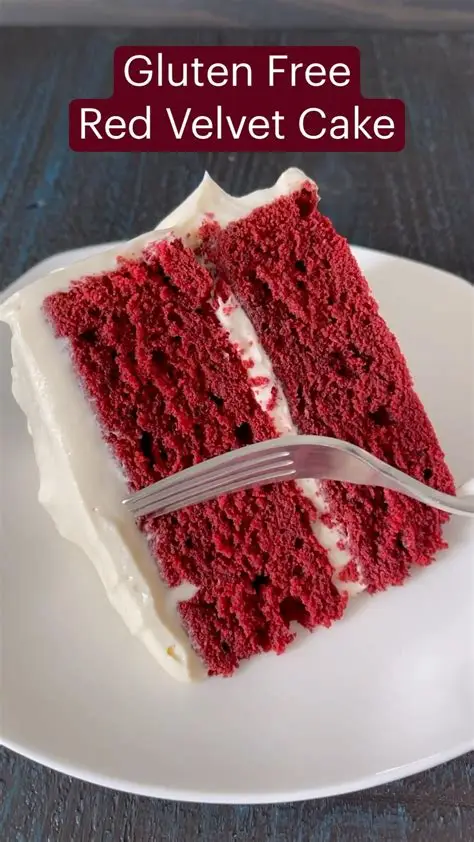
If you love classic red velvet cake but need a gluten-free option, this Gluten-Free Red Velvet Cake is the perfect recipe to try. It is soft, moist, tender, beautifully red, and covered with a rich and creamy cream cheese frosting that makes every bite absolutely delicious. You do not have to give up your favorite dessert just because you are avoiding gluten. With the right combination of gluten-free flour, cocoa powder, buttermilk, and a few simple ingredients, you can make a homemade red velvet cake that tastes just as indulgent as the traditional version. This cake is perfect for birthdays, family gatherings, holidays, afternoon tea, dinner parties, celebrations, or simply when you want to treat yourself to something special. The texture is light and soft, while the cocoa gives it a gentle chocolate flavor without overpowering the classic red velvet taste. The cream cheese frosting adds a smooth, slightly tangy sweetness that pairs beautifully with the rich cake. To make this gluten-free red velvet cake, you will need gluten-free all-purpose flour, unsweetened cocoa powder, baking soda, baking powder, salt, granulated sugar, eggs, vegetable oil, buttermilk, vanilla extract, red food coloring, and a small amount of white vinegar. For the frosting, prepare softened cream cheese, unsalted butter, powdered sugar, and vanilla extract. Make sure all ingredients, especially the flour, cocoa powder, baking powder, baking soda, food coloring, and other packaged ingredients, are certified gluten-free if you are preparing this cake for someone with celiac disease or a strong gluten intolerance. Start by preheating your oven to 350°F or 175°C. Grease two 8-inch round cake pans and line the bottoms with parchment paper. This will make it much easier to remove the cakes after baking. In a medium bowl, combine the gluten-free all-purpose flour, unsweetened cocoa powder, baking soda, baking powder, and salt. Whisk these dry ingredients together until everything is evenly distributed. Set the bowl aside while you prepare the wet ingredients. In a large mixing bowl, add the granulated sugar and vegetable oil. Beat them together until well combined. Add the eggs one at a time, mixing after each addition. Pour in the buttermilk and vanilla extract, then mix until the batter becomes smooth. Buttermilk is especially important in red velvet cake because it helps create a soft, tender texture and adds a pleasant slight tanginess. Add the red food coloring and mix until the batter reaches a deep, beautiful red color. You can adjust the amount of food coloring depending on the shade you prefer. Next, gradually add the dry ingredients to the wet ingredients. Mix gently until everything is just combined. Do not overmix the batter because overmixing can make the cake heavier instead of light and tender. Once the batter is smooth, add the vinegar and gently fold it through the mixture. The vinegar reacts with the baking soda and helps create a soft and airy cake. Divide the batter evenly between the prepared cake pans and smooth the tops with a spatula. Place the pans in the preheated oven and bake for approximately 25 to 30 minutes, or until a toothpick inserted into the center comes out clean or with only a few moist crumbs attached. Baking time can vary slightly depending on your oven and the exact size of your cake pans, so keep an eye on the cakes toward the end of the baking time. Once baked, remove the cakes from the oven and allow them to cool in their pans for about 10 minutes. Carefully transfer them to a wire rack and let them cool completely before adding the frosting. It is very important to let the cakes cool completely because frosting a warm cake can cause the cream cheese frosting to melt and slide off. While the cakes are cooling, prepare the cream cheese frosting. Place softened cream cheese and softened unsalted butter in a large bowl and beat until smooth and creamy. Gradually add the powdered sugar, mixing well after each addition. Add the vanilla extract and continue beating until the frosting becomes light, fluffy, and easy to spread. If the frosting seems too soft, place it in the refrigerator for a short time to firm it up. Once the cake layers are completely cool, place one layer on a serving plate or cake stand. Spread a generous layer of cream cheese frosting over the top. Place the second cake layer on top and gently press it into place. Cover the top and sides of the cake with the remaining frosting. You can create a smooth finish or leave the frosting slightly rustic for a homemade look. For an extra beautiful presentation, crumble a small piece of red velvet cake and sprinkle the crumbs over the top of the frosting. You can also decorate the cake with small cream cheese frosting swirls or a few simple red velvet crumbs around the edges. Refrigerate the finished cake for at least 30 minutes before slicing. This helps the frosting set and makes the cake easier to cut. When you are ready to serve, use a sharp knife to cut generous slices and enjoy the beautiful combination of soft red velvet cake and creamy frosting. One of the best things about this recipe is that the cake can be prepared ahead of time. You can bake the cake layers a day in advance, allow them to cool completely, wrap them well, and store them until you are ready to frost and decorate the cake. The finished cake should be stored in the refrigerator because of the cream cheese frosting. Allow it to sit at room temperature for a few minutes before serving so the texture becomes soft and delicious again. If you want to make this recipe even more special, you can add a few simple variations. For a stronger chocolate flavor, slightly increase the amount of cocoa powder while keeping the balance of the other ingredients. You can also add a small amount of finely grated chocolate to the batter for an extra chocolatey touch. For a festive presentation, decorate the cake with red velvet crumbs, white chocolate shavings, or simple frosting decorations. You can even make this recipe as cupcakes by dividing the batter among lined cupcake cups and reducing the baking time. These cupcakes are wonderful for parties and lunchbox treats. For the best results, always measure your gluten-free flour accurately. Too much flour can make the cake dry and dense. If possible, use a gluten-free flour blend that contains a combination of rice flour, tapioca starch, potato starch, or other suitable gluten-free ingredients designed for baking. Letting the batter rest for a few minutes before baking can also help some gluten-free flour blends hydrate properly, although you should avoid letting it sit for too long if your leavening agents are already active. The result should be a beautiful, soft, moist, and flavorful red velvet cake with a gorgeous deep red color and a creamy white frosting. This cake proves that gluten-free baking can still be incredibly delicious, satisfying, and impressive. Whether you are making it for a special celebration or simply want to enjoy a homemade dessert with your family, this Gluten-Free Red Velvet Cake is sure to become a favorite. Serve it with a cup of coffee, tea, or a cold glass of milk for the perfect sweet treat. If you try this recipe, let me know how it turned out in the comments. I would love to hear whether you enjoyed the soft texture, rich red velvet flavor, and creamy cream cheese frosting. And if you know someone who loves red velvet cake or needs gluten-free dessert ideas, share this recipe with them. Don’t forget to Like, Share, and Comment so more cake lovers can discover this delicious Gluten-Free Red Velvet Cake recipe! ❤️🍰
Posted inUncategorized
Gluten-Free Red Velvet Cake Recipe
Posted by
 No Comments
No Comments
Post navigation
Previous Post
 Gluten-Free Celebration Cake Recipe
Next Post
Decadent Chocolate Oreo Dream Cake