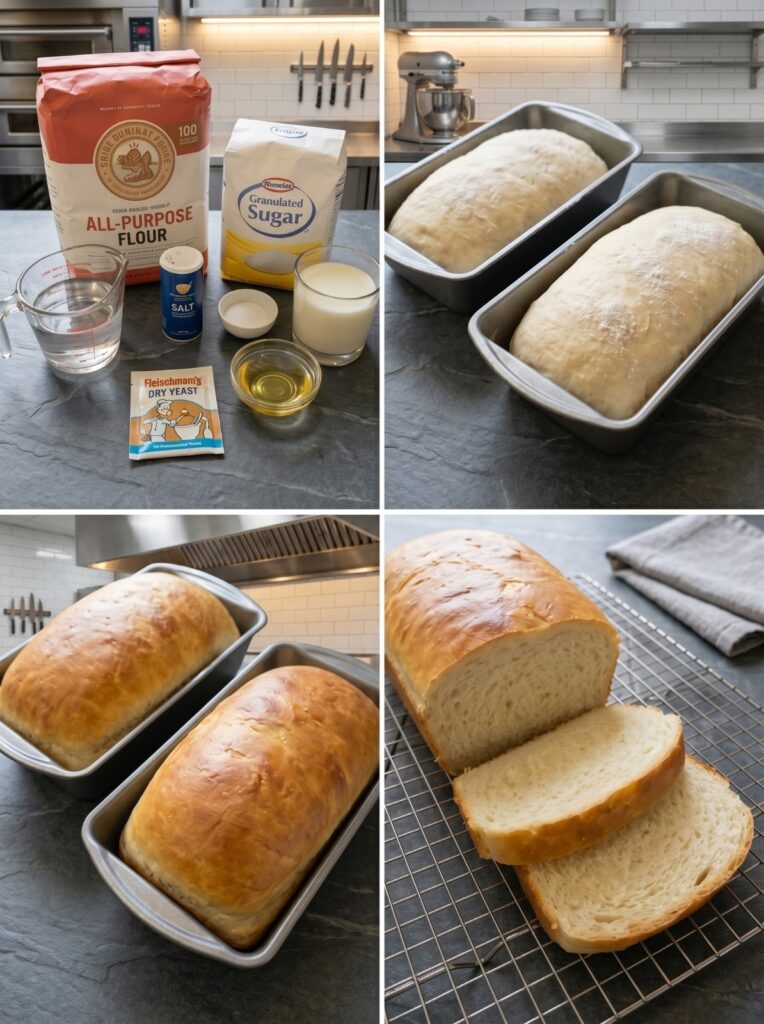

There is nothing quite like the aroma of freshly baked homemade bread filling your kitchen. This classic white sandwich bread is incredibly soft, fluffy, and slightly sweet with a tender crumb and a beautiful golden crust. It is perfect for breakfast toast, sandwiches, French toast, grilled cheese, garlic bread, or simply enjoyed warm with butter. Unlike store-bought bread, this homemade loaf contains simple pantry ingredients and no unnecessary preservatives, giving you a fresher, healthier, and more flavorful result. Whether you are a beginner baker or someone with years of baking experience, this foolproof recipe will help you create bakery-quality bread every single time. The dough is easy to prepare, rises beautifully, and bakes into two perfectly soft loaves with a light texture that stays fresh for days. Once you experience the taste of homemade bread straight from the oven, it will quickly become a staple recipe in your kitchen.
Ingredients
- 6 cups all-purpose flour or bread flour
- 2¼ teaspoons active dry yeast (1 packet)
- 2 cups warm milk (110°F/43°C)
- ¼ cup warm water
- ¼ cup granulated sugar
- 2 teaspoons salt
- ¼ cup vegetable oil or melted unsalted butter
- 1 large egg (optional, for a richer loaf)
- 2 tablespoons melted butter for brushing after baking
Instructions
Begin by activating the yeast. In a large mixing bowl, combine the warm water, warm milk, sugar, and active dry yeast. Stir gently and let the mixture sit for about five to ten minutes until it becomes foamy. This indicates that the yeast is active and ready to use. If the mixture does not foam, the yeast may be expired or the liquid may have been too hot or too cold.
Once the yeast is activated, add the vegetable oil and egg if using. Stir until everything is well combined. Add the salt, then gradually mix in the flour one cup at a time. Stir continuously until a shaggy dough begins to form. As the dough becomes thicker, transfer it onto a lightly floured work surface.
Knead the dough for approximately eight to ten minutes by hand, or five to six minutes using a stand mixer fitted with a dough hook. The dough should become smooth, soft, and elastic. It should feel slightly tacky but should not stick heavily to your hands. If necessary, add a little more flour, one tablespoon at a time, until the desired consistency is reached. Avoid adding too much flour, as this can make the bread dense instead of soft.
Place the kneaded dough into a lightly greased bowl, turning it once so the entire surface is coated with oil. Cover the bowl with plastic wrap or a clean kitchen towel and place it in a warm, draft-free location. Allow the dough to rise for approximately one to one and a half hours or until it has doubled in size.
Once the dough has doubled, gently punch it down to release the trapped air. Transfer it to a clean surface and divide it evenly into two equal portions. Shape each portion into a rectangle by gently flattening the dough with your hands. Starting from one short end, roll the dough tightly into a log, pinching the seams closed. Tuck the ends underneath to create smooth loaves.
Grease two standard 9×5-inch loaf pans with butter or cooking spray. Place one shaped loaf into each pan with the seam side facing down. Cover the pans loosely with a clean towel and allow the dough to rise again for approximately forty-five to sixty minutes. The dough should rise about one inch above the rim of the loaf pans.
While the dough is completing its second rise, preheat your oven to 350°F (175°C). Ensure the oven is fully heated before placing the bread inside.
Bake the loaves for thirty to thirty-five minutes or until the tops become deep golden brown. The bread should sound hollow when tapped on the bottom, and the internal temperature should reach approximately 190°F (88°C). If the tops begin browning too quickly during baking, loosely cover them with aluminum foil for the final ten minutes.
Remove the loaves from the oven and immediately brush the tops with melted butter. This step creates a softer crust and adds a rich buttery flavor. Allow the bread to cool in the pans for about ten minutes before transferring the loaves to a wire cooling rack. Let the bread cool completely before slicing to maintain its soft texture and prevent the slices from becoming gummy.
Tips for Perfect Homemade Bread
Always use fresh yeast for the best rise. Warm liquids should feel comfortably warm but never hot, as excessive heat can kill the yeast. Bread flour produces a slightly chewier loaf with better structure, while all-purpose flour creates a softer texture. Kneading thoroughly helps develop gluten, which gives the bread its soft and airy crumb. Allowing enough time for both rises is essential for achieving light, fluffy bread. Never rush the proofing process, as under-proofed dough can result in dense loaves.
If your kitchen is cool, place the covered bowl inside an unheated oven with the oven light turned on. The gentle warmth creates an ideal environment for the dough to rise.
Variations
This recipe can easily be customized to suit your taste. Replace part of the white flour with whole wheat flour for a heartier loaf. Add honey instead of sugar for a slightly sweeter flavor. Mix in oats, sesame seeds, sunflower seeds, or flaxseed for added texture and nutrition. You can also include herbs such as rosemary or garlic powder to make savory sandwich bread. For a richer loaf, substitute melted butter for the vegetable oil and include an extra egg.
Storage Instructions
Store the cooled bread in an airtight container or bread bag at room temperature for up to four days. Avoid refrigerating the bread because refrigeration can dry it out more quickly. If you want to keep it longer, slice the loaf before freezing. Wrap the slices tightly in plastic wrap and place them inside a freezer-safe bag. Frozen bread will maintain its quality for up to three months. Simply thaw slices at room temperature or toast them directly from frozen.
Serving Suggestions
This homemade white bread is incredibly versatile and can be enjoyed in many different ways. Serve it warm with butter and homemade jam for breakfast, use it to prepare classic sandwiches for lunch, or make delicious grilled cheese with your favorite cheeses. Thick slices are perfect for French toast, bread pudding, garlic bread, and homemade croutons. It also pairs beautifully with soups, stews, pasta dishes, and salads.
Frequently Asked Questions
Can I use instant yeast instead of active dry yeast?
Yes. Instant yeast can be mixed directly with the dry ingredients without proofing first. Use the same amount and follow the remaining instructions.
Can I prepare the dough ahead of time?
Yes. After the first rise, shape the loaves and refrigerate them overnight. Allow them to come to room temperature and complete the second rise before baking.
Why is my bread dense?
Dense bread is usually caused by adding too much flour, under-kneading, expired yeast, or not allowing the dough enough time to rise.
Can I make one large loaf instead of two?
Absolutely. This recipe can be baked as one large loaf, although the baking time may need to be increased by ten to fifteen minutes.
Homemade white sandwich bread is one of the most rewarding recipes you can make from scratch. With its soft texture, golden crust, and delicious homemade flavor, it far surpasses anything you can buy at the grocery store. The simple ingredients, easy preparation, and dependable results make this recipe ideal for everyday baking. Whether you are making toast for breakfast, sandwiches for lunch, or serving warm slices alongside dinner, this classic bread will quickly become a family favorite. Once you bake your own fresh loaf and enjoy its rich aroma and irresistible taste, you’ll find yourself returning to this recipe again and again.