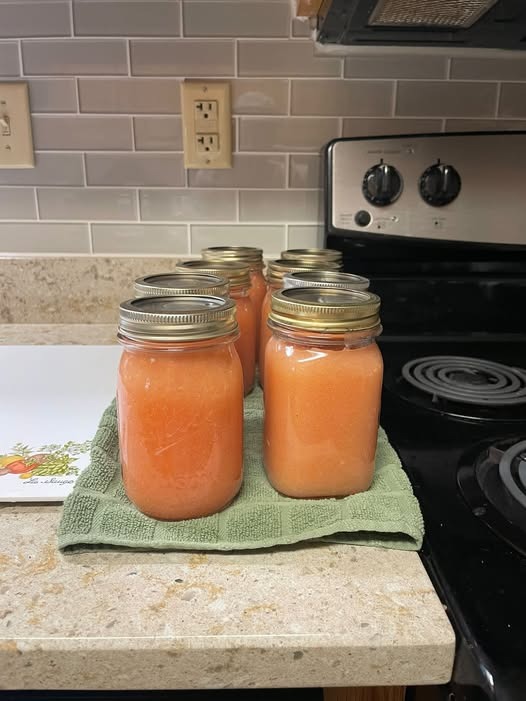

This homemade peach and apricot nectar is one of those old-fashioned recipes that makes the kitchen smell absolutely amazing. It is smooth, naturally sweet, fruity, and full of fresh summer flavor. The beautiful golden-orange color makes it look just as good in jars as it tastes. It is delicious served chilled on its own, poured over ice, mixed into smoothies, or used as a base for other drinks and desserts.
If you have a large amount of ripe peaches or apricots from the garden, farmers market, or grocery store, this is a wonderful way to preserve their flavor. The fruit is cooked until tender, blended until silky smooth, and adjusted with a little sugar and lemon juice for a bright, balanced taste.
Ingredients
- 6 pounds ripe peaches, apricots, or a combination of both
- 4 cups water
- 1 to 1½ cups granulated sugar, depending on the sweetness of the fruit
- ½ cup fresh lemon juice
- 1 teaspoon pure vanilla extract, optional
- ¼ teaspoon salt, optional
Instructions
1. Prepare the Fruit
Start with ripe, flavorful peaches and apricots. The fruit should be soft enough to smell sweet and fragrant but should not have mold, fermentation, or extensive bruising.
Wash all the fruit thoroughly under cool running water. Remove the stems, pits, and any damaged portions. Peaches can be peeled if you prefer an especially smooth nectar, although peeling is not absolutely necessary when the mixture will be blended and strained.
Cut the fruit into smaller pieces. Smaller pieces cook more quickly and make it easier to create a smooth puree.
2. Cook the Fruit
Place the prepared fruit into a large stainless-steel or nonreactive pot. Add approximately 4 cups of water. The water does not need to completely cover the fruit because the peaches and apricots will release additional liquid as they cook.
Bring the mixture to a gentle boil over medium heat. Once it begins bubbling, reduce the heat and let the fruit simmer for about 15–25 minutes.
Stir occasionally so the fruit does not stick to the bottom of the pot.
The fruit is ready when it is extremely soft and easily breaks apart when pressed with a spoon. If your fruit is particularly firm, it may need a little additional cooking time.
3. Blend Until Smooth
Remove the pot from the heat and allow the mixture to cool slightly.
Using an immersion blender, carefully blend the cooked fruit directly in the pot until completely smooth. You can also transfer the mixture to a regular blender in batches.
Be extremely careful when blending hot liquids because steam can build pressure inside a blender.
For an extra-smooth nectar, pour the blended mixture through a fine-mesh strainer. Use the back of a spoon or spatula to press the puree through the strainer, leaving behind any remaining pieces of skin or fibrous material.
4. Sweeten the Nectar
Return the smooth fruit mixture to the pot.
Add the sugar gradually, tasting as you go. Very ripe fruit may require much less sugar than tart fruit. Start with 1 cup and add more if necessary.
Add the fresh lemon juice and stir well.
The lemon juice gives the nectar a brighter flavor and balances the sweetness. It also adds acidity, which is important when working with fruit intended for preservation.
If you like, add a small amount of vanilla extract. Vanilla is optional, but it gives the nectar a lovely dessert-like flavor.
5. Adjust the Consistency
At this point, check the consistency.
For a thick fruit nectar, leave it as it is. For a thinner drink, add a little more hot water until you reach the consistency you prefer.
Remember that the nectar may seem slightly thicker while hot and become a little easier to pour after cooling.
Taste once more and adjust the sugar or lemon juice if necessary.
6. Prepare the Jars
If you are serving the nectar immediately or storing it in the refrigerator, clean glass jars with tight-fitting lids are suitable.
For long-term shelf storage, however, do not simply pour the hot nectar into jars, close the lids, and leave them on the counter. Fruit purees and nectars require a properly tested preservation method because thickness, acidity, and processing time all affect safety.
For shelf-stable canning, use a tested recipe and follow current USDA/NCHFP canning guidance for the specific fruit product rather than estimating a processing time.
Wash jars, lids, and equipment carefully and keep everything clean throughout the process.
7. Fill the Jars
If you are making this as a refrigerator or freezer recipe, ladle the warm nectar into clean jars, leaving enough space at the top for expansion.
Wipe the rims carefully with a clean damp cloth. Secure the lids and allow the jars to cool.
Once completely cool, place them in the refrigerator.
For longer storage, the nectar can also be frozen in freezer-safe containers. Leave adequate headspace because liquid expands when frozen.
8. Cool and Serve
After chilling, shake or stir the nectar before serving.
Pour it into a glass over ice and enjoy it cold. The flavor is especially delicious on a hot summer day.
You can also dilute it with cold water or sparkling water if you prefer a lighter drink.
For a breakfast drink, blend the nectar with yogurt and ice. You can also add it to smoothies, drizzle it over pancakes, mix it into oatmeal, or use it as a fruity ingredient in desserts.
Tips for the Best Flavor
The quality of the fruit makes the biggest difference. Choose peaches and apricots that are ripe, fragrant, and naturally sweet.
If the fruit is very sweet, reduce the sugar. If it is tart, add a little more sugar after blending.
For a richer peach flavor, use mostly peaches with a smaller amount of apricots. For a more tangy nectar, increase the apricot portion.
If you want an incredibly smooth texture, strain the blended fruit twice. This takes a little extra time but creates a silky nectar similar to the texture shown in the jars.
You can also freeze the nectar in small portions so you can thaw only what you need.
This homemade peach and apricot nectar is a wonderful way to enjoy the taste of fresh summer fruit long after the season is over. It is simple, colorful, naturally fruity, and incredibly versatile. Whether you pour it into a cold glass, use it in a smoothie, or save it for a special dessert, homemade nectar is always worth the effort.
Important preservation note: If you plan to keep these jars at room temperature for months, use a tested canning recipe and the recommended processing method for the exact fruit mixture. Do not rely on sealing the jars while hot or turning them upside down, as that does not make a home-canned product safely shelf-stable.