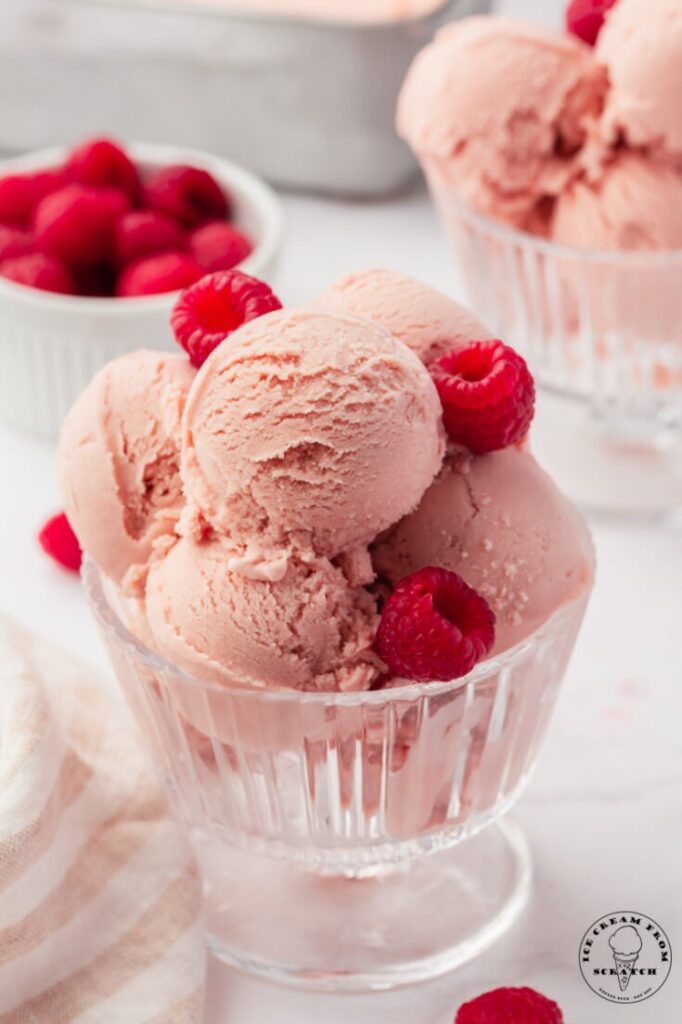

There’s something extra special about homemade ice cream, especially when it’s filled with the fresh, bright flavor of raspberries. This Homemade Raspberry Ice Cream is creamy, smooth, fruity, and incredibly refreshing. The beautiful pink color comes naturally from the raspberries, while every spoonful delivers a delicious balance of sweet and slightly tangy berry flavor.
This recipe is perfect for summer gatherings, family desserts, birthday celebrations, or simply making a special treat at home. You don’t need many ingredients, and the preparation is surprisingly simple. Once you make it yourself, you may find yourself wanting to keep a container in the freezer all the time!
Ingredients
3 cups fresh or frozen raspberries
¾ cup granulated sugar, divided
1 tablespoon fresh lemon juice
2 cups heavy cream
1 cup whole milk
1 teaspoon vanilla extract
Pinch of salt
Optional
Fresh raspberries for serving
White chocolate chips
Raspberry sauce
Crushed cookies
A little powdered sugar for topping
Step 1: Prepare the Raspberries
Start by washing the fresh raspberries gently under cool running water. If you’re using frozen raspberries, allow them to thaw slightly before beginning.
Place the raspberries in a saucepan along with about ½ cup of the sugar and the lemon juice. Cook the mixture over medium heat, stirring occasionally.
As the raspberries heat up, they will begin to soften and release their natural juices. Continue cooking for approximately 5–8 minutes, until the berries break down and the mixture becomes juicy and slightly thickened.
The lemon juice helps brighten the natural raspberry flavor and balances the sweetness.
Step 2: Make the Raspberry Puree
Remove the raspberry mixture from the heat and allow it to cool for a few minutes.
For a completely smooth ice cream, press the raspberry mixture through a fine-mesh sieve to remove most of the seeds. Use the back of a spoon to press the berries and extract as much puree as possible.
If you enjoy raspberry seeds and a more rustic texture, you can skip this step.
Set the raspberry puree aside and allow it to cool completely.
Step 3: Prepare the Cream Mixture
In a large bowl, combine the heavy cream, whole milk, remaining sugar, vanilla extract, and a small pinch of salt.
Whisk everything together until the sugar has dissolved.
The heavy cream gives the ice cream its rich and creamy texture, while the milk keeps it from becoming overly heavy. Vanilla adds a subtle background flavor that complements the raspberries beautifully.
Step 4: Combine the Raspberry and Cream Mixtures
Once the raspberry puree has cooled completely, pour it into the cream mixture.
Stir gently until everything is thoroughly combined. The mixture should become a beautiful pink color with an irresistible raspberry aroma.
Taste the mixture before freezing. If you prefer a sweeter ice cream, you can add a little more sugar. If you prefer a stronger raspberry flavor, a little extra raspberry puree can be added as well.
Remember that frozen desserts taste slightly less sweet once frozen, so the mixture should taste pleasantly sweet before it goes into the freezer.
Step 5: Chill the Mixture
Cover the bowl and refrigerate the ice cream mixture for at least 2 hours.
Chilling the mixture thoroughly before churning helps create a smoother final texture. If you have time, you can refrigerate it overnight.
This is also a great make-ahead step if you want to prepare the mixture the day before serving.
Step 6: Churn the Ice Cream
Pour the chilled raspberry mixture into your ice cream maker and churn according to the manufacturer’s instructions.
As the mixture churns, it will gradually become thicker and creamier. Depending on your machine, this usually takes around 20–30 minutes.
When the ice cream reaches a soft-serve consistency, it is ready for the next step.
If you don’t have an ice cream maker, don’t worry. You can still make a delicious homemade version. Pour the chilled mixture into a shallow freezer-safe container and freeze it. Every 30–45 minutes, remove it from the freezer and stir or whisk thoroughly to break up ice crystals. Repeat several times until the ice cream becomes thick and creamy.
Step 7: Add Extra Raspberries
For even more raspberry flavor, gently fold a handful of chopped fresh raspberries into the churned ice cream.
You can also swirl in a little homemade raspberry sauce for beautiful ribbons of berry flavor throughout the ice cream.
Avoid adding too much liquid because excess moisture can make the finished ice cream harder to scoop.
Step 8: Freeze Until Firm
Transfer the finished ice cream to a freezer-safe container.
Smooth the top with a spatula and, if desired, scatter a few fresh raspberries over the surface.
Cover tightly and freeze for at least 4 hours, or until firm.
For the best texture, allow the ice cream to sit at room temperature for about 5–10 minutes before scooping. This gives it enough time to soften slightly and makes serving much easier.
Tips for the Creamiest Raspberry Ice Cream
Use ripe raspberries. Fresh, flavorful berries produce the best-tasting ice cream.
Don’t skip the lemon juice. A small amount helps enhance the raspberry flavor and keeps the ice cream from tasting overly sweet.
Cool the raspberry mixture completely. Adding hot fruit puree to the cream mixture can affect the texture.
Chill before churning. A thoroughly chilled base generally freezes more efficiently and produces a smoother texture.
Use full-fat dairy. Heavy cream and whole milk help create a rich, creamy dessert.
Store it properly. Keep the ice cream in a tightly sealed freezer-safe container to help prevent ice crystals from forming.
Delicious Variations
This raspberry ice cream is wonderful on its own, but there are plenty of ways to make it your own.
For a raspberry chocolate version, fold in mini chocolate chips or finely chopped dark chocolate before freezing.
For a raspberry cheesecake ice cream, add small pieces of cheesecake or a swirl of sweetened cream cheese mixture.
You can also create a raspberry vanilla combination by adding a little extra vanilla to the base.
For a crunchy variation, mix in crushed shortbread cookies just before transferring the ice cream to the freezer.
Another delicious option is to layer the ice cream with raspberry sauce in the storage container. Each scoop will contain beautiful ribbons of fruity sauce.
How to Serve Raspberry Ice Cream
Scoop the ice cream into chilled bowls or waffle cones and top with fresh raspberries.
For a simple presentation, add a few berries and a small drizzle of raspberry sauce.
You can also serve it alongside warm brownies, chocolate cake, shortbread cookies, or a slice of pound cake. The combination of cold raspberry ice cream and a warm chocolate dessert is especially delicious.
For a party, create an ice cream bar with different toppings such as chocolate chips, crushed cookies, fresh fruit, whipped cream, and chocolate sauce. Everyone can create their own dessert.
How to Store Homemade Ice Cream
Keep the ice cream in an airtight, freezer-safe container. Pressing a piece of parchment paper or plastic wrap directly against the surface before sealing can help reduce exposure to air.
Homemade ice cream is generally best enjoyed within a couple of weeks for the best texture and flavor.
If the ice cream becomes very hard in the freezer, let it sit at room temperature for several minutes before scooping.
Final Thoughts
This Homemade Raspberry Ice Cream is a simple dessert that delivers beautiful color, creamy texture, and plenty of fresh berry flavor. The combination of sweet raspberries, creamy dairy, vanilla, and a touch of lemon creates a refreshing dessert that is perfect for almost any occasion.
Whether you’re using fresh summer raspberries or frozen berries from the freezer, this recipe is an easy and delicious way to turn them into something special.
Make a batch for your family, serve it at your next gathering, or keep it tucked away in the freezer for those moments when you want a homemade dessert. Add fresh raspberries on top, grab a spoon, and enjoy every creamy, fruity bite!