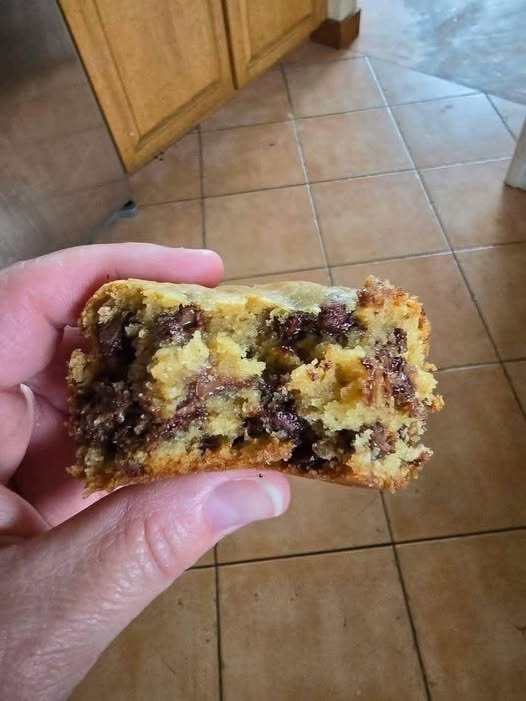

These soft, buttery chocolate chip cookie bars are the perfect treat when you want something richer and easier than making individual cookies. They have a golden, slightly crisp edge, a soft and chewy center, and plenty of melted chocolate throughout every bite. The texture is somewhere between a classic chocolate chip cookie and a fudgy blondie, making them especially delicious while they are still slightly warm.
This recipe is simple enough for beginners and requires no complicated equipment. Everything comes together in one bowl, and the dough can be pressed directly into a baking pan. You can use semi-sweet chocolate chips, milk chocolate chips, dark chocolate, or a mixture of different chocolates depending on how rich you want the bars to be.
Ingredients
For the Cookie Bars
- 1 cup (226 g) unsalted butter, melted and slightly cooled
- 1 cup (200 g) packed light brown sugar
- ½ cup (100 g) granulated white sugar
- 2 large eggs
- 2 teaspoons pure vanilla extract
- 2 ½ cups (315 g) all-purpose flour
- 1 teaspoon baking soda
- ½ teaspoon baking powder
- ½ teaspoon salt
- 1 ½ to 2 cups (255–340 g) chocolate chips
- ½ cup chopped chocolate, optional
- ½ cup chopped walnuts or pecans, optional
Optional Topping
- Extra chocolate chips
- A small pinch of flaky sea salt
- Melted chocolate for drizzling
Equipment
You will need a large mixing bowl, a whisk or wooden spoon, a spatula, measuring cups and spoons, and a 9 x 13-inch baking pan. Line the pan with parchment paper, leaving a little paper hanging over the sides. This makes it much easier to remove the baked cookie bars later.
Step 1: Prepare the Oven and Pan
Preheat your oven to 350°F (175°C). If your oven tends to run hot, you can bake the bars at 340°F (170°C) and allow them a few extra minutes.
Line a 9 x 13-inch baking pan with parchment paper. Lightly grease the parchment with butter or nonstick cooking spray. Make sure the sides are also lightly greased so the bars don’t stick.
Using parchment paper is particularly helpful because these bars are soft when they first come out of the oven.
Step 2: Combine the Butter and Sugars
Place the melted butter in a large mixing bowl. Add the brown sugar and granulated sugar.
Whisk everything together for about 1–2 minutes until the mixture becomes smooth and glossy. You don’t need an electric mixer for this recipe.
The brown sugar gives the cookie bars their chewy texture and deep caramel flavor, while the white sugar helps create slightly crisp edges.
Make sure the melted butter has cooled somewhat before adding the eggs. If the butter is extremely hot, it can partially cook the eggs.
Step 3: Add the Eggs and Vanilla
Add the eggs one at a time, whisking well after each addition. Add the vanilla extract and mix until everything is smooth and evenly combined.
The mixture should look thick, shiny, and slightly creamy.
Don’t overbeat the eggs. You only need to mix until they’re incorporated.
Step 4: Mix the Dry Ingredients
In a separate bowl, combine the all-purpose flour, baking soda, baking powder, and salt.
Give the dry ingredients a quick stir to distribute the baking soda and salt evenly.
Gradually add the dry ingredients to the wet mixture. Use a spatula or wooden spoon to gently fold everything together.
Stop mixing as soon as you no longer see large streaks of dry flour. Overmixing can make the cookie bars tougher instead of soft and chewy.
The finished dough should be thick and soft.
Step 5: Add the Chocolate
Fold in the chocolate chips.
For an extra chocolatey result, use a combination of chocolate chips and chopped chocolate. Chopped chocolate melts into little pockets throughout the bars, while chocolate chips maintain their shape better during baking.
Reserve a small handful of chocolate chips for the top.
If you like nuts, fold in about ½ cup of chopped walnuts or pecans. The nuts add a pleasant crunch and balance the sweetness of the chocolate.
Step 6: Transfer the Dough to the Pan
Scoop the cookie dough into the prepared baking pan.
Use a spatula or your hands to gently spread the dough evenly across the pan. The dough will be thick, so take your time spreading it into the corners.
Sprinkle the reserved chocolate chips over the surface.
For an attractive bakery-style finish, you can also add a few small pieces of chopped chocolate on top.
If you enjoy the sweet-and-salty combination, sprinkle a very small amount of flaky sea salt over the top before baking.
Step 7: Bake
Place the pan in the preheated oven and bake for approximately 22–28 minutes.
The exact baking time depends on your oven and how soft you want the bars.
For softer, gooier cookie bars, remove them when the edges are golden brown but the center still looks slightly soft.
For firmer bars, bake for a few additional minutes until the center looks more set.
Don’t wait for the entire surface to become dark golden brown. The cookie bars will continue cooking from the residual heat after you remove them from the oven.
A toothpick inserted into the center should come out with a few moist crumbs. If it comes out completely clean, the bars may be slightly overbaked.
Step 8: Cool Completely
Allow the cookie bars to cool in the pan for at least 20–30 minutes.
This step is important. They will be very soft when they’re hot, and cutting them immediately can cause them to fall apart.
For clean, bakery-style slices, allow them to cool completely before cutting.
If you prefer an extra gooey texture, serve one while it is still slightly warm. You can even place a warm piece in the microwave for about 10–15 seconds before serving.
Step 9: Cut and Serve
Once cooled, lift the entire slab out of the pan using the parchment paper.
Place it on a cutting board and cut into squares or rectangular bars.
Depending on the size you choose, this recipe makes approximately 18–24 cookie bars.
Serve them plain, with a glass of cold milk, alongside coffee, or topped with a scoop of vanilla ice cream.
For an extra indulgent dessert, drizzle the cooled bars with melted chocolate or caramel sauce.
Tips for Perfect Cookie Bars
Don’t overbake them. This is the most important tip. Cookie bars should look slightly underdone in the center when they come out of the oven. They will firm up as they cool.
Use room-temperature eggs. They mix more easily with the butter and sugar and help create a smoother batter.
Don’t overmix the flour. Once the flour disappears, stop mixing.
Use good-quality chocolate. Since chocolate is one of the main flavors, using good chocolate makes a noticeable difference.
For thicker bars, use a smaller square baking pan and increase the baking time slightly.
For extra gooey bars, add more chopped chocolate to the batter and slightly underbake them.
For crispier edges, bake them a few minutes longer and allow them to cool completely before cutting.
Storage
Store the cooled cookie bars in an airtight container at room temperature for up to 4–5 days. Place parchment paper between layers if you are stacking them.
You can also refrigerate them if you prefer a firmer, denser texture. Before serving, allow refrigerated bars to sit at room temperature for a little while or warm them briefly in the microwave.
The bars can also be frozen. Wrap individual pieces tightly in plastic wrap and place them in a freezer-safe container or bag. They can be frozen for approximately 2–3 months. Thaw them at room temperature before serving.
These chocolate chip cookie bars are especially good for parties, bake sales, holidays, lunchboxes, or whenever you want a homemade dessert without spending time scooping and baking dozens of individual cookies. The combination of buttery cookie dough, brown sugar, and melted chocolate creates a soft, chewy dessert with plenty of chocolate in every bite.