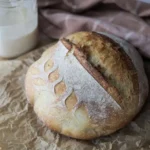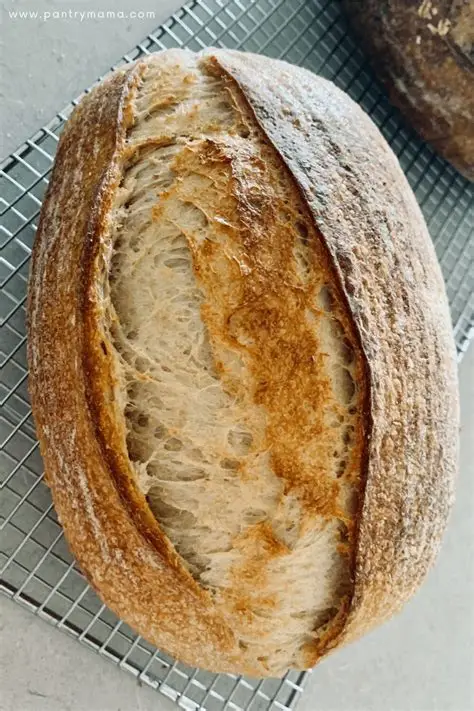

Homemade Artisan Sourdough Bread is one of those recipes that makes your kitchen smell absolutely incredible. With its beautifully crisp golden crust, soft and airy center, and naturally developed flavor, this rustic loaf is perfect for breakfast, sandwiches, toast, or simply enjoying warm with a little butter. The loaf shown here has a gorgeous crackly crust and a wonderfully open crumb, making it the kind of homemade bread that looks straight out of a professional bakery.
The best thing about sourdough bread is that it does not require complicated ingredients. The basic recipe uses only flour, water, sourdough starter, and salt. What makes the bread special is the fermentation process. Instead of relying on commercial yeast alone, a healthy sourdough starter naturally ferments the dough and gives the bread its characteristic flavor, texture, and beautiful rise.
To make a homemade artisan sourdough loaf, you will need an active sourdough starter, bread flour or strong white flour, water, and salt. A kitchen scale is highly recommended because weighing the ingredients makes sourdough baking much more consistent. You will also need a large mixing bowl, a dough scraper if available, parchment paper, and a Dutch oven or another heavy oven-safe baking pot with a lid.
Before beginning the recipe, make sure your sourdough starter is active and healthy. A good starter should be bubbly, lively, and have increased noticeably in volume after feeding. It should have a pleasant tangy aroma rather than an unpleasant or rotten smell. Using an active starter is one of the most important steps for achieving a good rise.
Begin by adding the water and active sourdough starter to a large mixing bowl. Stir them together until the starter is mostly dispersed throughout the water. The mixture may look slightly cloudy, which is completely normal.
Add the flour and mix everything together until there are no large patches of dry flour remaining. At this stage, the dough may look rough and shaggy. Do not worry if it does not look smooth yet.
Allow the flour and water mixture to rest for a short period. This resting stage allows the flour to absorb the water and helps begin gluten development naturally.
After resting, add the salt. Work the salt into the dough using your hands. You can gently pinch, fold, and squeeze the dough until the salt is evenly distributed.
The dough will initially feel sticky, but resist the temptation to add large amounts of extra flour. Sourdough dough often becomes smoother and more manageable as gluten develops during folding and fermentation.
Cover the bowl and allow the dough to begin its first rise, also called bulk fermentation. During this stage, the sourdough starter ferments the dough and produces gases that will eventually help create the airy structure inside the loaf.
During the first part of bulk fermentation, perform a series of gentle stretch-and-folds. To do this, wet your hand slightly, reach underneath one side of the dough, gently stretch it upward, and fold it over the center. Rotate the bowl and repeat the process around the dough.
You can perform several rounds of folds at intervals during the first few hours of fermentation. These folds help strengthen the gluten structure without requiring traditional kneading.
As fermentation continues, the dough should gradually become smoother, stronger, and more elastic. It should also become noticeably lighter and more inflated.
The exact fermentation time can vary considerably depending on the temperature of your kitchen, the strength of your starter, and the hydration of your dough. A warm environment will generally speed up fermentation, while a cooler environment will slow it down.
Rather than relying only on the clock, pay attention to the dough. It should look slightly puffy and expanded, with some bubbles developing around the edges or underneath the surface.
Once bulk fermentation is complete, gently turn the dough onto a lightly floured work surface. Try not to handle it too aggressively because you want to preserve some of the air that has developed during fermentation.
Shape the dough into a loose round and allow it to rest for a short time. This is sometimes called a bench rest and gives the gluten a chance to relax.
After the dough has rested, perform the final shaping. Gently stretch the outer edges of the dough and fold them toward the center. Turn the dough over and use your hands to create surface tension by gently pulling the dough toward you across the work surface.
The goal is to create a smooth, tight outer surface while keeping the inside light and airy.
Place the shaped dough seam-side up into a well-floured proofing basket or a bowl lined with a clean, lightly floured kitchen towel.
Cover the dough and allow it to undergo its final proof. You can proof it at room temperature or place it in the refrigerator for a slower fermentation.
Cold fermentation is especially useful for sourdough because it can make the dough easier to handle and can develop a deeper, more complex flavor. Many bakers allow the shaped dough to rest in the refrigerator overnight and bake it the following day.
When you are ready to bake, preheat your oven with a Dutch oven or heavy covered baking pot inside. The pot needs to become very hot before the dough goes in.
Carefully turn the chilled dough onto a piece of parchment paper. Dust off any excess flour if necessary.
Now comes the scoring stage. Using a very sharp bread lame or razor blade, make one or more deliberate cuts across the surface of the dough.
Scoring is important because it gives the expanding loaf a controlled place to open during baking. It also creates the beautiful decorative crust pattern seen on artisan sourdough loaves.
Carefully transfer the dough into the preheated Dutch oven. Place the lid on top and return the pot to the oven.
The covered baking stage traps steam around the dough. This steam helps the crust remain flexible during the early part of baking, allowing the loaf to expand dramatically and develop a beautiful open shape.
After the initial covered baking period, remove the lid and continue baking. The loaf will gradually become golden brown and develop a deep, crisp crust.
Keep an eye on the color during the final stage. A good sourdough loaf should have a rich golden-brown crust, and some areas may become quite dark. The darker crust contributes wonderful roasted and caramelized flavors.
Once the loaf is completely baked, carefully remove it from the Dutch oven and place it on a wire cooling rack.
As tempting as it may be to cut into the bread immediately, allow it to cool before slicing. The interior continues to set as the loaf cools, and cutting too early can result in a gummy crumb.
Once cooled, use a sharp serrated bread knife to slice the loaf. You should see a soft, airy interior surrounded by a beautifully crisp crust.
The finished bread is delicious in countless ways. Slice it thickly and serve it with butter for a simple breakfast. Toast it and spread it with jam, honey, or your favorite fruit preserve.
It also makes wonderful sandwiches. The sturdy crust and chewy interior hold up beautifully with cheese, vegetables, roasted meats, eggs, or other sandwich fillings.
For a simple snack, toast a slice and top it with avocado, tomatoes, olive oil, salt, and pepper. You can also use sourdough as the base for bruschetta, garlic bread, or homemade croutons.
Another delicious idea is French toast. The slightly tangy flavor of sourdough works wonderfully with eggs, milk, cinnamon, vanilla, and maple syrup.
If you have leftover bread that has become slightly firm, do not throw it away. Cut it into cubes and turn it into croutons, breadcrumbs, bread pudding, or stuffing.
The key to successful sourdough bread is patience. Unlike quick breads, sourdough requires time for fermentation and gluten development. The dough may seem slow at first, but allowing the natural fermentation process to work is what creates the unique flavor and texture.
Temperature also plays an important role. If your kitchen is cool, fermentation may take longer. If your kitchen is warm, the dough may ferment much faster.
Your sourdough starter also makes a big difference. A weak or inactive starter may produce a dense loaf, while a strong and active starter can create impressive rise and an airy crumb.
If your first loaf does not look perfect, do not be discouraged. Sourdough baking takes practice, and every loaf teaches you something about hydration, fermentation, shaping, and baking.
The beautiful loaf shown in the picture has the classic characteristics of artisan sourdough: a deeply golden crust, dramatic scoring, rustic flour dusting, and a soft interior with plenty of natural air pockets.
Homemade sourdough is especially satisfying because you are creating something delicious from such simple ingredients. There is something wonderful about mixing flour and water, watching the dough ferment, shaping it by hand, and finally seeing it transform into a beautiful golden loaf inside the oven.
For the best results, keep notes about your baking process. Write down the amount of flour and water you use, the room temperature, fermentation times, and how the dough behaves. Over time, these notes can help you understand your starter and make adjustments for your kitchen.
Once you become comfortable with the basic recipe, you can experiment with different flours and flavors. Whole wheat flour can add a deeper, nuttier taste. Rye flour can provide a distinctive earthy flavor. You can also add seeds, herbs, roasted garlic, olives, cheese, or other ingredients to create different varieties of artisan bread.
No matter how you customize it, the foundation remains the same: a healthy sourdough starter, quality flour, proper fermentation, gentle shaping, and a hot oven.
The result is a rustic homemade loaf with a crunchy crust, chewy texture, and delicious naturally fermented flavor. It is perfect for sharing with family and friends, serving alongside soups and stews, or simply enjoying warm with butter.
Once you experience the aroma of freshly baked sourdough filling your kitchen, you may never want to go back to ordinary store-bought bread. This homemade artisan loaf is simple, beautiful, flavorful, and incredibly rewarding to bake.
So prepare your starter, mix your dough, give it plenty of time to ferment, shape it carefully, score the top, and bake it until beautifully golden. Then let it cool, slice it open, and enjoy that wonderful crisp crust and soft, airy center.
Homemade Artisan Sourdough Bread is more than just bread—it is a simple, comforting homemade treat that turns a few basic ingredients into something truly special. 🍞❤️