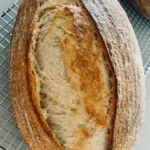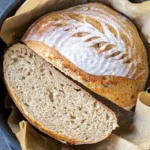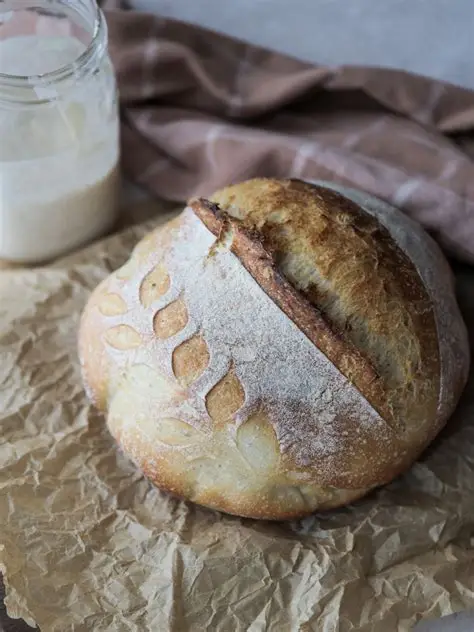

This beautiful Homemade Rustic Sourdough Bread has everything you want in a freshly baked artisan loaf: a crisp golden-brown crust, a soft and chewy center, a deliciously tangy flavor, and a gorgeous rustic appearance. The decorative scoring across the top gives the loaf a beautiful bakery-style finish, while the naturally fermented dough creates a wonderful texture inside.
Sourdough bread is one of those homemade recipes that takes patience, but the result is absolutely worth the wait. Made with simple ingredients such as flour, water, sourdough starter, and salt, this bread develops its flavor naturally through fermentation. The process may take longer than making ordinary bread, but the deep flavor and beautiful texture make every step worthwhile.
To make this rustic sourdough loaf, you will need an active sourdough starter, bread flour, water, and salt. A kitchen scale is recommended because measuring ingredients by weight gives more consistent results. You will also need a large mixing bowl, a dough scraper, a clean kitchen towel or proofing basket, parchment paper, and a Dutch oven or another heavy oven-safe pot with a lid.
The first and most important step is preparing your sourdough starter. Your starter should be active, bubbly, and strong enough to help the dough rise. A healthy starter usually becomes noticeably larger after feeding and develops a pleasant fermented aroma.
If your starter has been sitting in the refrigerator, feed it and allow it to become active before using it. The strength of the starter plays a major role in how quickly your dough ferments and how much the finished loaf rises.
Once your starter is ready, place the required amount into a large mixing bowl. Add the water and stir gently until the starter is dispersed throughout the water. The mixture will become slightly cloudy and should have a smooth appearance.
Add the bread flour and mix until the water and flour are completely combined. You can use your hands, a wooden spoon, or a dough whisk. At this point, the dough may look rough, sticky, and uneven. That is completely normal.
Cover the bowl and allow the dough to rest. This resting period gives the flour time to absorb the water and allows gluten development to begin naturally.
After the initial rest, add the salt and work it into the dough thoroughly. You can gently pinch the dough with your fingers, fold it over itself, or use a combination of methods until the salt is evenly incorporated.
Do not worry if the dough feels sticky. Sourdough dough often becomes easier to handle as fermentation progresses and the gluten structure develops.
Cover the bowl again and begin the bulk fermentation stage. This is when the sourdough starter works throughout the dough, producing gases and developing the characteristic flavor associated with naturally fermented bread.
During the first few hours of bulk fermentation, perform several rounds of stretch-and-folds. Wet your hand lightly, reach underneath one side of the dough, stretch it upward, and fold it over the center. Turn the bowl and repeat the process around the dough.
These gentle folds help strengthen the gluten without requiring heavy kneading. After each round, cover the bowl and allow the dough to rest before repeating the process.
As the dough ferments, you will notice changes in its appearance. It should gradually become smoother, stronger, and more elastic. Small bubbles may begin appearing along the sides of the bowl, and the dough should slowly increase in volume.
The fermentation time depends on several factors, including the temperature of your kitchen, the strength of your starter, and the amount of water used in the dough. A warm kitchen will speed up fermentation, while a cooler environment will make the process take longer.
Rather than following the clock alone, pay attention to the dough. When it looks noticeably puffier and has developed bubbles, it is usually ready for the next stage.
Once bulk fermentation is complete, lightly flour your work surface and gently turn the dough out of the bowl. Try not to press all the air out of the dough because those bubbles will contribute to the light texture of the finished bread.
Shape the dough gently into a round and allow it to rest for a short time. This resting period allows the gluten to relax and makes the final shaping easier.
For the final shaping, gently stretch the edges of the dough and fold them toward the center. Turn the dough over so the seam is underneath. Using your hands, gently pull the dough toward yourself across the work surface to create surface tension.
The finished dough should have a smooth, slightly tight outer surface. Be careful not to tear the dough or press it too aggressively.
Place the shaped loaf into a well-floured proofing basket or a bowl lined with a clean kitchen towel. Place the dough seam-side up.
Cover the dough and allow it to proof. You can let it rise at room temperature or place it in the refrigerator for a slower overnight fermentation.
Cold fermentation is a popular method because it allows the sourdough flavor to develop more deeply while also making the dough easier to score and handle. An overnight rest in the refrigerator can produce a beautifully flavorful loaf.
When you are ready to bake, preheat your oven with a Dutch oven or heavy covered pot inside. The pot should become very hot before the bread is added.
Carefully turn the chilled dough onto parchment paper. Dust the surface lightly with flour if desired. The flour creates the beautiful rustic appearance seen on the loaf.
Now it is time to score the bread. Use a very sharp bread lame or razor blade to make a long, confident cut across the top of the loaf.
You can also create decorative patterns with additional small cuts. The scoring shown on the loaf creates an elegant rustic design and allows the bread to expand in a controlled way during baking.
Carefully transfer the dough into the hot Dutch oven. Put the lid on and place the pot into the preheated oven.
The covered baking stage is extremely important because the steam trapped inside the pot helps the crust remain flexible during the first part of baking. This allows the loaf to expand and develop a beautiful rise.
After the initial covered baking period, remove the lid and continue baking the loaf uncovered. The crust will gradually become darker, crispier, and more golden.
Bake until the loaf has developed a rich golden-brown color and the crust feels firm. The exact baking time can vary depending on your oven and the size of the loaf.
Once the bread is finished, carefully remove it from the Dutch oven and place it on a wire rack.
This is where patience becomes especially important. Do not cut the bread immediately after removing it from the oven. Allow it to cool completely before slicing.
The interior of the bread continues to set as it cools. Cutting into it too early can cause the crumb to become gummy or compressed.
Once the loaf has cooled, use a sharp serrated bread knife to slice through the crisp crust. The inside should be soft, chewy, and airy, with a beautiful network of natural holes.
This homemade sourdough bread is delicious served simply with butter. A warm slice with salted butter is one of the easiest and most satisfying ways to enjoy it.
You can also toast the bread and spread it with homemade jam, honey, peanut butter, cream cheese, or your favorite fruit preserve.
For a savory breakfast, top a slice with avocado, eggs, tomatoes, cheese, or roasted vegetables. The sturdy sourdough texture makes it perfect for open-faced sandwiches.
It also makes excellent sandwiches. The crisp crust and chewy interior hold up well with meats, cheeses, vegetables, and spreads.
Another wonderful way to use sourdough is to serve it alongside soups and stews. The bread is perfect for dipping into creamy soups, tomato soup, chili, or hearty vegetable dishes.
If you have leftover slices, turn them into garlic toast, croutons, breadcrumbs, French toast, or bread pudding.
The rustic loaf shown in the picture has a beautiful flour-dusted surface and a dramatic score running across the top. Its golden crust and artisan appearance make it look incredibly inviting.
One of the most rewarding parts of sourdough baking is watching a simple mixture of flour and water transform into a beautiful loaf. The fermentation process requires time, but there is something incredibly satisfying about knowing that the flavor and texture developed naturally.
If your first sourdough loaf does not turn out perfectly, do not give up. Sourdough baking takes practice, and small changes in temperature, hydration, fermentation, shaping, and baking can make a noticeable difference.
Keep track of your ingredients, fermentation times, room temperature, and how the dough feels. With each loaf, you will become more familiar with the behavior of your starter and dough.
Once you feel comfortable with the basic recipe, you can experiment with different flours. Whole wheat flour can add a nutty flavor, while rye flour creates a deeper and more earthy taste.
You can also add seeds such as sunflower seeds, pumpkin seeds, sesame seeds, or flaxseeds. Herbs, roasted garlic, olives, cheese, and other flavorful ingredients can also be incorporated for different variations.
The possibilities are almost endless, but the basic sourdough method remains the same: use an active starter, mix the dough carefully, allow enough time for fermentation, strengthen the dough with gentle folds, shape it properly, proof it, score it, and bake it in a very hot oven.
The result is a beautiful artisan loaf with a crisp crust and soft, flavorful interior.
This Homemade Rustic Sourdough Bread is perfect for breakfast, lunch, dinner, snacks, or simply enjoying fresh from the oven. It is a recipe that turns a few simple ingredients into something truly special.
The golden crust, soft center, rustic flour finish, and beautiful scoring make this loaf look just as impressive as anything you might find in a bakery.
Once you have a loaf cooling on your kitchen counter, the aroma alone will make the wait worthwhile. Slice it, add a little butter, and enjoy the wonderful combination of crisp crust and soft, chewy bread.
Homemade sourdough is more than just a recipe. It is a slow, rewarding baking process that brings incredible flavor and texture to the table. With a little patience and practice, you can create a beautiful rustic loaf like this right in your own kitchen. 🍞❤️