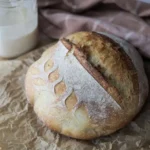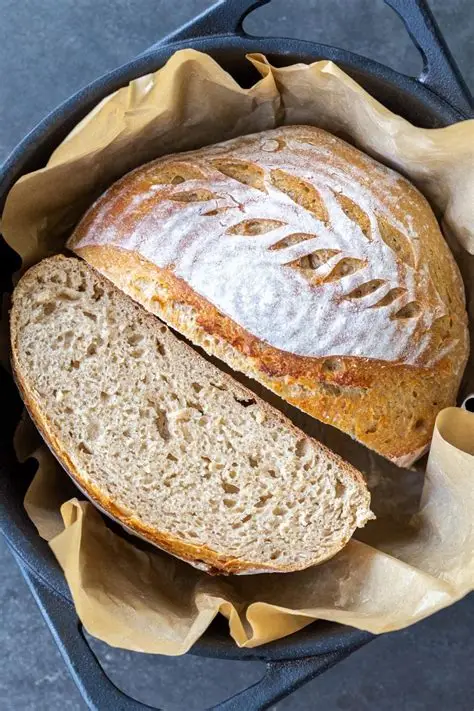

There is something incredibly satisfying about baking a beautiful loaf of Homemade Rustic Sourdough Bread from scratch. With its golden-brown crust, soft and chewy center, delicate air pockets, and naturally developed flavor, this bread is the perfect example of how a few simple ingredients can create something truly special. The loaf shown here has a wonderfully rustic appearance, with a lightly floured crust and decorative scoring that gives it a beautiful bakery-style finish.
Homemade sourdough bread is made using a few basic ingredients: flour, water, an active sourdough starter, and salt. Unlike many quick bread recipes, sourdough depends on natural fermentation. The starter helps the dough rise while also developing the slightly tangy, complex flavor that makes sourdough so delicious.
To begin, make sure your sourdough starter is active and ready to use. A healthy starter should look bubbly and lively after feeding and should have increased noticeably in volume. The starter should also have a pleasant fermented aroma. Using an active starter is one of the most important steps because it provides the natural strength needed to make the dough rise.
For the flour, bread flour works especially well because it contains enough protein to develop a strong gluten structure. You can also use a mixture of bread flour and whole wheat flour if you want a slightly nuttier and more rustic flavor.
Start by adding the active sourdough starter and water to a large mixing bowl. Stir until the starter is mostly dissolved throughout the water. The mixture should look slightly cloudy and smooth.
Add the flour and mix everything together until there are no obvious dry patches remaining. You do not need to knead the dough at this stage. Simply make sure all of the flour has absorbed the water.
The dough may look rough and sticky in the beginning, but this is completely normal. Cover the bowl and allow the mixture to rest for a while. This resting period allows the flour to fully absorb the water and begins the process of gluten development.
After the resting period, add the salt. Gently work the salt into the dough using your hands. You can pinch the dough between your fingers, fold it over itself, or use a combination of techniques until the salt is evenly incorporated.
Once everything is combined, cover the bowl and allow the dough to begin bulk fermentation. This is the stage where the sourdough starter becomes active throughout the dough, producing gases and developing flavor.
During the first few hours of fermentation, gently stretch and fold the dough several times. To do this, wet your hand slightly, reach underneath one side of the dough, stretch it upward, and fold it toward the center. Rotate the bowl and repeat the process around the dough.
Stretching and folding helps strengthen the gluten structure without requiring heavy kneading. After each round, cover the dough and let it rest before performing the next round.
As the dough ferments, you will notice that it begins to change. It should become smoother, stronger, and more elastic. The dough should also gradually become puffier, and small bubbles may begin appearing along the sides of the bowl.
The exact fermentation time can vary depending on the temperature of your kitchen, the strength of your sourdough starter, and the ingredients you use. A warmer kitchen will generally make the dough ferment faster, while a cooler kitchen will slow the process.
Instead of relying only on a specific number of hours, look at the dough itself. When it has expanded, looks slightly airy, and has developed bubbles, it is usually ready for shaping.
Lightly flour your work surface and gently turn the dough out of the bowl. Be careful not to handle it too roughly because you want to keep some of the air that has developed during fermentation.
Shape the dough gently into a round and allow it to rest for a short time. This resting stage allows the gluten to relax and makes the final shaping easier.
For the final shaping, gently stretch the edges of the dough and fold them toward the center. Turn the dough over so the seam is underneath. Using your hands, gently pull the dough toward yourself across the work surface to create surface tension.
The goal is to create a smooth, slightly tight outer surface without tearing the dough. Proper shaping helps the loaf maintain its structure while it rises and bakes.
Place the shaped dough into a well-floured proofing basket or a bowl lined with a clean kitchen towel. Position the dough seam-side up and cover it.
At this point, you can allow the dough to proof at room temperature or place it in the refrigerator for a slower fermentation. An overnight cold proof is a popular method because it allows the flavor to develop gradually and makes the dough easier to handle the next day.
When you are ready to bake, preheat your oven with a Dutch oven or heavy oven-safe pot inside. The pot should become extremely hot before the dough is added.
Carefully turn the dough onto a piece of parchment paper. Lightly dust the surface with flour if desired. The flour gives the loaf that beautiful rustic appearance seen in the picture.
Now comes the scoring stage. Using a very sharp bread lame or razor blade, make a long, confident cut across the top of the loaf. You can also create decorative cuts around the main score to produce a beautiful pattern.
Scoring is important because it gives the bread a controlled area where it can expand during baking. Without scoring, the loaf may crack unpredictably as the dough expands.
Carefully transfer the dough into the preheated Dutch oven and place the lid on top.
The covered baking stage creates a steamy environment inside the pot. This steam helps the crust stay flexible during the first part of baking, allowing the bread to rise dramatically and develop that beautiful rounded shape.
After the initial covered baking period, remove the lid and continue baking the bread uncovered. This allows moisture to escape and helps the crust become crisp and deeply golden.
The loaf should develop a beautiful golden-brown color. Some areas may become darker, especially around the scored sections. This darker crust adds wonderful roasted and caramelized flavors.
Once the bread is completely baked, carefully remove it from the Dutch oven and place it on a wire cooling rack.
Although the aroma will make you want to cut into the bread immediately, it is important to let it cool before slicing. The inside of the loaf continues to set as it cools, and slicing too soon can result in a gummy or compressed center.
Once completely cooled, use a sharp serrated bread knife to slice through the crust.
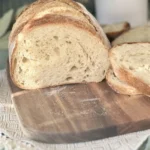
The inside should be soft, chewy, and tender, with a beautiful network of small and medium-sized air pockets. The crust should provide a satisfying crunch with every bite.
This Homemade Rustic Sourdough Bread is delicious in so many ways. For a simple breakfast, slice it and spread it with butter. The combination of warm toasted sourdough and creamy butter is incredibly comforting.
You can also toast the bread and add homemade jam, honey, peanut butter, cream cheese, or fruit preserves. The slight tanginess of sourdough pairs beautifully with both sweet and savory toppings.
For a savory meal, use the bread for sandwiches. The sturdy crust and chewy center make it perfect for cheese, vegetables, eggs, roasted meats, or your favorite sandwich fillings.
Sourdough also makes a wonderful base for avocado toast. Toast a thick slice and top it with mashed avocado, tomatoes, salt, pepper, and a drizzle of olive oil.
Another delicious option is garlic bread. Spread softened butter mixed with garlic and herbs over slices of sourdough and bake until warm and golden.
This bread is also excellent served alongside soups and stews. The crisp crust is perfect for dipping into creamy soups, tomato soup, chili, or hearty vegetable dishes.
If you have leftover bread, do not throw it away. Older sourdough can be transformed into homemade croutons, breadcrumbs, stuffing, French toast, or bread pudding.
The loaf shown in the picture has a beautiful rustic appearance. The golden crust, light dusting of flour, decorative scoring, and soft interior make it look like something you would find in an artisan bakery.
One of the most rewarding parts of sourdough baking is that the bread develops its flavor naturally over time. The fermentation process creates a depth of flavor that is difficult to achieve with quick bread recipes.
Patience is one of the most important ingredients in sourdough baking. The dough needs enough time to ferment properly, and rushing the process can result in a dense loaf.
Temperature also matters. If your kitchen is warm, fermentation may happen quickly. If the room is cool, the dough may require significantly more time.
Your sourdough starter is equally important. A strong and active starter will produce better fermentation and a more reliable rise. If your starter is weak, give it regular feedings until it becomes bubbly and active.
Sourdough baking also takes practice. Your first loaf may not look exactly like the picture, and that is perfectly fine. Every loaf teaches you something about your starter, flour, hydration, fermentation, shaping, and baking temperature.
Once you become comfortable with the basic recipe, you can experiment with different flavors and ingredients. Add whole wheat flour for a hearty loaf, rye flour for an earthy flavor, or seeds for extra texture.
You can also add roasted garlic, fresh herbs, olives, cheese, caramelized onions, or other ingredients to create your own signature sourdough bread.
For a sweeter variation, you can experiment with cinnamon, raisins, dried fruit, or nuts. The possibilities are almost endless.
The key is to maintain the basic sourdough process: use an active starter, mix the dough thoroughly, allow enough time for fermentation, strengthen the dough with gentle folds, shape it carefully, proof it properly, score the surface, and bake it in a hot oven.
The result is a loaf that is crispy on the outside, soft and chewy inside, and packed with naturally developed flavor.
Homemade Rustic Sourdough Bread is perfect for breakfast, lunch, dinner, snacks, or simply enjoying fresh from the oven. It is a wonderful recipe to make when you want something comforting and homemade.
There is something special about taking a simple mixture of flour and water and turning it into a beautiful golden loaf. From feeding the starter to shaping the dough and finally hearing the crust crackle as the bread cools, every step is part of the experience.
Once the loaf is completely cooled, slice it thickly and enjoy it with your favorite toppings. Serve it alongside a warm bowl of soup, use it for sandwiches, or simply spread it with butter and enjoy the natural flavor of freshly baked sourdough.
With its crisp golden crust, soft chewy center, beautiful scoring, and delicious homemade flavor, this Rustic Sourdough Bread is sure to become a favorite in your kitchen.
It may require a little patience, but the final result is absolutely worth it. 🍞❤️ A warm homemade loaf like this is proof that simple ingredients, time, and a little care can create something incredibly delicious.