
My first attempt at making English Muffins, and honestly, I’m already wondering why I ever bought them from the store! They may not look absolutely perfect yet, but the taste was incredible. They turned out soft and tender inside, lightly crisp and golden on the outside, with that classic cornmeal-coated texture that makes English muffins so delicious.
This recipe is surprisingly simple and uses basic pantry ingredients. The dough does need some time to rise, but most of the work is hands-off. Once you make them at home, you’ll understand why homemade English muffins are so much better than store-bought ones. They are fresh, warm, slightly chewy, and perfect for breakfast.
Ingredients
- 3 ½ cups all-purpose flour
- 1 ½ teaspoons salt
- 2 tablespoons granulated sugar
- 2 ¼ teaspoons active dry yeast
- 1 cup warm milk
- ½ cup warm water
- 2 tablespoons unsalted butter, melted
- Cornmeal, for dusting
- A little vegetable oil or butter for cooking
Instructions
1. Activate the Yeast
Start by warming the milk and water. They should be warm to the touch but not hot. If the liquid is too hot, it can kill the yeast.
Pour the warm milk and water into a large mixing bowl. Add the sugar and active dry yeast. Stir gently and let the mixture sit for about 5–10 minutes. The yeast should become foamy on top. This is a good sign that your yeast is active and ready to use.
If your yeast does not foam after several minutes, it may be old or the liquid may have been too hot or too cold. It’s better to start again before continuing with the recipe.
2. Make the Dough
Once the yeast mixture is ready, add the melted butter and salt. Begin adding the flour gradually, stirring as you go.
You may not need every last bit of flour, so pay attention to the texture of the dough. You want a soft, slightly sticky dough that comes together easily. Avoid adding too much flour because that can make the English muffins dense instead of light and tender.
Transfer the dough to a lightly floured surface and knead it for about 5–8 minutes. You can also knead it in a stand mixer using a dough hook.
The finished dough should feel smooth and elastic. If it is extremely sticky, add a little more flour, one tablespoon at a time.
3. Let the Dough Rise
Place the dough into a lightly greased bowl and cover it with plastic wrap or a clean kitchen towel.
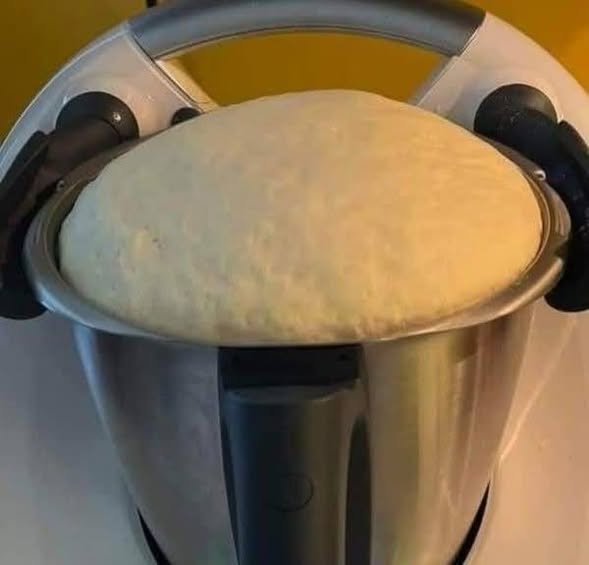
Let it rise in a warm, draft-free place for approximately 1–1 ½ hours, or until it has doubled in size.
The exact rising time will depend on the temperature of your kitchen. A warmer kitchen will usually make the dough rise faster, while a cooler kitchen may take longer.
Don’t rush this step. Allowing the dough enough time to rise helps create those beautiful little pockets inside the English muffins.
4. Shape the English Muffins
Once the dough has doubled in size, gently press it down to release some of the air.
Transfer it to a lightly floured surface and roll it out to approximately ½-inch to ¾-inch thickness.
Using a round biscuit cutter, cookie cutter, or even a drinking glass, cut the dough into circles.
Try to cut the circles as close together as possible so you don’t have to re-roll the dough too many times. Repeatedly rolling the dough can make the muffins slightly tougher.
Sprinkle a baking sheet or large tray generously with cornmeal. Carefully place the dough rounds on top, leaving a little space between each one.
Sprinkle the tops with more cornmeal, then cover them loosely with a clean towel.
Let the shaped muffins rest for another 20–30 minutes.
5. Cook the English Muffins
Heat a large skillet, griddle, or cast-iron pan over medium-low heat. Lightly grease the surface with a small amount of butter or oil.
Carefully place the English muffins into the pan, making sure not to overcrowd them.
Cook them slowly for approximately 5–7 minutes on the first side. You want the bottoms to become golden brown without burning.
Flip them carefully and cook for another 5–7 minutes on the other side.
The key is to keep the heat moderate. If the pan is too hot, the outside can become dark before the center has a chance to cook properly.
If your muffins are thick, you can lower the heat slightly and give them a little extra cooking time.
They should feel lightly firm when pressed and have a beautiful golden color on both sides.
6. Let Them Cool
Transfer the cooked English muffins to a wire rack and allow them to cool for at least 10–15 minutes before cutting.
For the classic English muffin texture, don’t slice them completely through with a knife. Instead, use a fork to gently split them around the middle. This helps preserve the little nooks and crannies inside.
Once opened, you’ll see the soft, slightly chewy interior that makes English muffins so special.
How to Serve Homemade English Muffins
There are so many ways to enjoy these homemade English muffins.
For a simple breakfast, toast one until the edges are golden and spread it with butter. Add your favorite jam, honey, or peanut butter for something sweet.
For a savory breakfast, top a toasted muffin with scrambled eggs, cheese, avocado, or bacon. You can also use them to make breakfast sandwiches.
They are also delicious with cream cheese and smoked salmon, or topped with sliced tomatoes and a sprinkle of salt and pepper.
If you like pizza-style snacks, add tomato sauce, mozzarella, and your favorite toppings before placing the muffin under the broiler for a few minutes.
Tips for Perfect English Muffins
The most important tip is to avoid making the dough too dry. A soft dough produces lighter English muffins.
Cooking them over medium-low heat is also important. English muffins are thicker than pancakes, so they need enough time for the center to cook while the outside slowly develops a golden crust.
Cornmeal is another important part of the recipe. It prevents the dough from sticking and gives the muffins their classic slightly crunchy exterior.
Don’t worry if your first batch isn’t perfectly round or identical. Homemade English muffins are supposed to have a little character! With each batch, you’ll get better at rolling, cutting, and cooking them.
Storage
Once completely cooled, store the English muffins in an airtight container or zip-top bag at room temperature for a couple of days.
For longer storage, place them in a freezer-safe bag and freeze them for up to a few months. When you’re ready to eat one, simply let it thaw and toast it.
Freezing them is a great way to have homemade English muffins ready whenever you want them.
Final Thoughts
These homemade English muffins might not look perfect on the first try, but don’t let that stop you. The flavor and texture are what really matter, and these are absolutely delicious.
They are soft in the middle, golden on the outside, slightly chewy, and perfect for toasting. Once you taste a freshly made English muffin with butter and jam, it’s hard to go back to the packaged ones.
This recipe is definitely one I’ll be making again and again. The first batch was a learning experience, but the taste was so good that I already know I’ll be perfecting the shape with my next batch.
Homemade English Muffins are easier than they look, and once you make them yourself, you may never want to buy them again!